How to Turn Ringer Off on MacBook

It's convenient to be able to take a call on your MacBook or iMac when all of your devices are connected.
However, there are a variety of reasons why you might need to know how to turn your Mac's ringer off. In this article, we'll go over several alternatives for turning off call alerts on your Mac.
You can always go for the easiest and quickest option - silencing your Mac altogether by setting its volume to the lowest, but doing so means all apps on your computer will no longer make any sound. This can be highly inconvenient when you’re trying to focus on work, and prefer listening to music or podcasts on Spotify, Apple Music, etc.
Hence, the best option is muting individual apps.
However, macOS devices don’t have a single button you can click, which will shut down some apps’ sounds - you need to turn off notifications and sounds for each individual app.
Doing this is a bit time-consuming, but you can always turn on one of the ‘Focus’ modes.
Check out the step-by-step process below to learn how to turn the ringer off on MacBooks!
Related: How to Lock Your Camera on MacBooks.
Silence Ringer on Mac Through Settings
The FaceTime app can be used to receive phone calls, even if the caller is not using video chat.
The FaceTime app requires Internet, not a SIM card, which means that if you have signed into FaceTime on your MacBook, all regular calls will also show up there.
Therefore, all you have to do to stop your Mac from ringing when you get a call is turn off FaceTime notifications on your Mac.
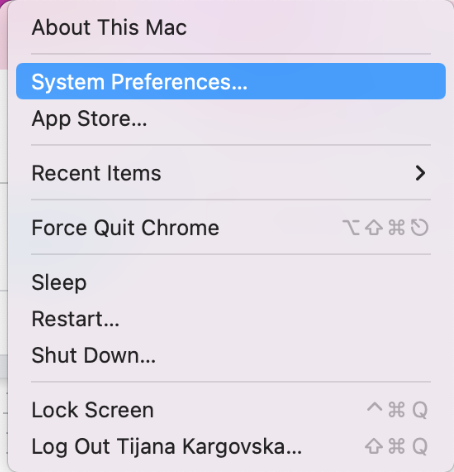
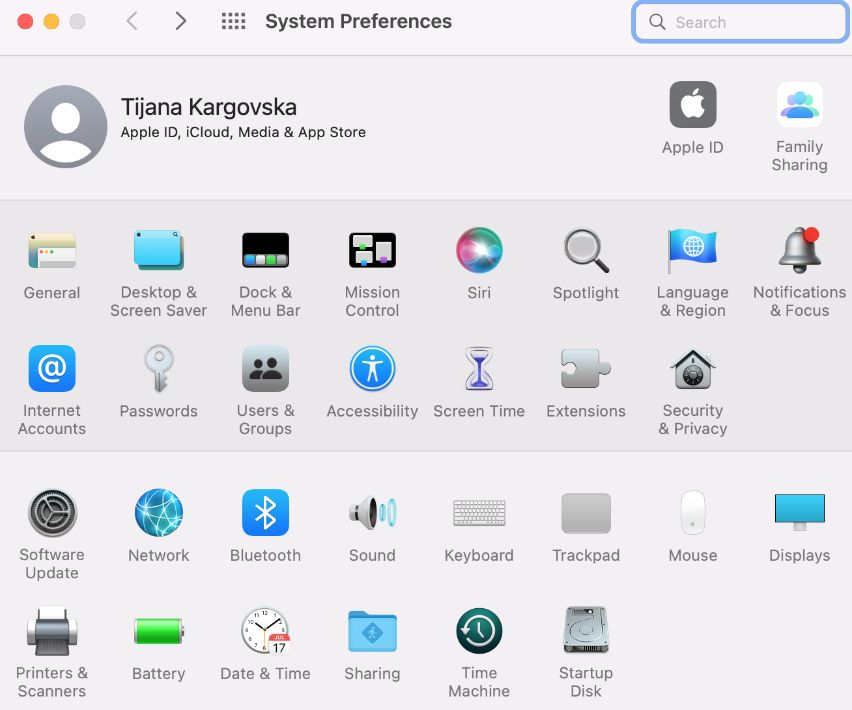
- Click on the Apple logo in the top-left corner, find ‘System Preferences’, click on it from the drop-down menu.
- Click on the ‘Notifications & Sounds’ setting, or use the Search Bar to type it in.
- Find FaceTime, and toggle the ‘Allow Notifications’ button to shut it down.
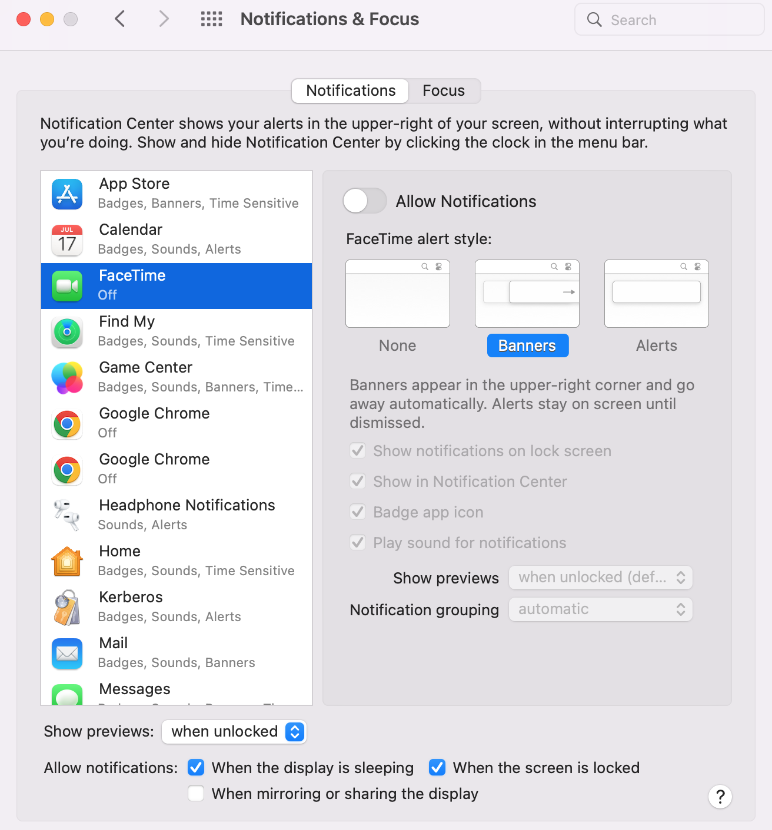
- The screen with FaceTime settings will turn gray once the notifications get turned off, and your Mac will no longer play sounds for notifications from FaceTime.
Disable Calls on Mac using your iPhone
The best thing about owning multiple Apple products and having them signed in to the same Apple ID is that you can make settings adjustments cross-devices. Follow these steps:
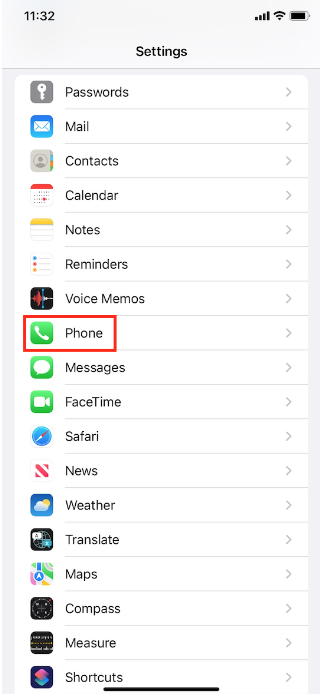
- On your iPhone, open the Settings app.
- Scroll down in the list of options and click on ‘Phone’.
- Under ‘Phone’, find the ‘Calls on Other Devices’ option and click on it.
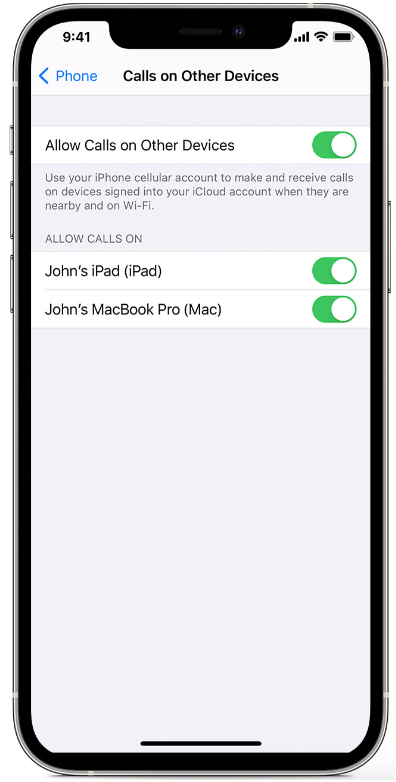
- On this screen, you can either toggle the switch next to ‘Allow Calls on Other Devices’ and turn the feature off on all connected Apple devices, or choose individual devices in the list below, and toggle the switch next to the desired device.
Disable Call Notifications on Mac from FaceTime Settings
The third method to turn off sounds on your MacBook Pro or MacBook Air is to do it directly from the FaceTime settings.
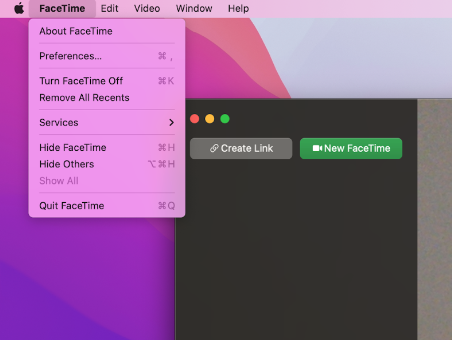
- On your Mac, open the FaceTime app.

- Click on ‘FaceTime’ in the top-left corner of the menu bar.
- From the drop-down menu, click on ‘Preferences’.
- Uncheck the box next to ‘Enable this account’.
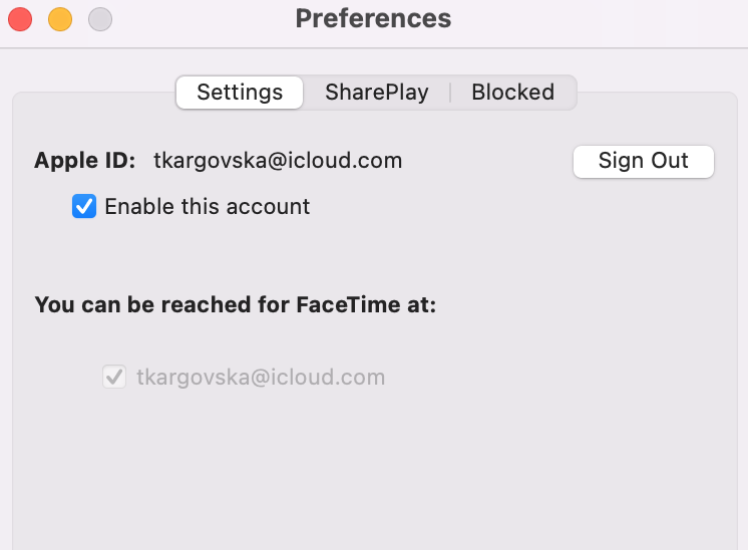
- After disabling the account from your Mac, you’ll still be able to receive audio and video calls on all other devices besides the MacBook.
You might also like: How to Lock Photos on MacBook, and How to Undo on a Mac.
Conclusion
Even though it’s a bit more difficult to turn off the ringer on MacBooks, the whole step-by-step process for either method shouldn’t take more than a couple of minutes from your time.
In this article, we explained how to turn off the ringer on your MacBook by silencing the ringer from your Mac settings, disabling calls from your iPhone, and disabling calls from the FaceTime app on your Mac.
If you liked this article, check out: How to Find the Passwords You Saved on Your Mac Desktop and How to Make and Edit a Screenshot on Mac OS X.
You might also find these articles interesting: