How to Move Files in Teams to Stay Organized and Neat

Key Takeaways
To move files in Microsoft Teams:
- Open Teams and go to the Files tab in a channel.
- If the file you want to move is in your OneDrive, click on ‘Files’ (left panel).
- Choose ‘OneDrive’.
- Click on the three vertical dots and click on ‘Move’.
Before diving into the topic title, let’s remind ourselves what Microsoft Teams can do for us - chat options, conversations within channels and teams, document storage, online video calling and screen sharing, online meetings, etc.
Now that we said that, if you still haven’t used Microsoft Teams before, it is about time you started using it because Teams is one of the best business communication platforms developed by Microsoft.
I use MS Teams daily, and even though I thought that moving files would be a piece of cake, in my experience, it wasn’t that easy the first time I tried. Anyways, I managed to learn the steps the hard way, and in this article, I am sharing the step-by-step guidelines for you to do it yourself.
Bonus read: How to join Teams meeting without account?
What is the move functionality in MS Teams?
Depending on whether the files someone shares are shared in a chat session or a Teams channel, the files can be displayed in different locations. Those sent in chat sessions are automatically stored in the sender’s OneDrive.
On the other hand, when you create a new Team in Teams, a SharePoint site is created in the background to store your documents, and each time you share files in a Team, they are stored in the associated site in SharePoint.
So, depending on which Team channel you shared your documents on, the location of those documents will be that of the Team channel you shared them in the first place. Also, by default, MS Teams has a General channel that cannot be deleted, and the files that are shared in this channel will be stored in the SharePoint site, in the Documents library within the General folder.
For example, you create a Team channel named ‘Content Project A’, and the files shared within this channel will be stored in SharePoint under the folder ‘Content Project A’.
That being said, new users who aren’t familiar with the flow of this should know that there are different ways to access their files;
- Within Microsoft Team
- Via SharePoint Online
How to move files in MS Teams
How to move files and folders between channels in Teams
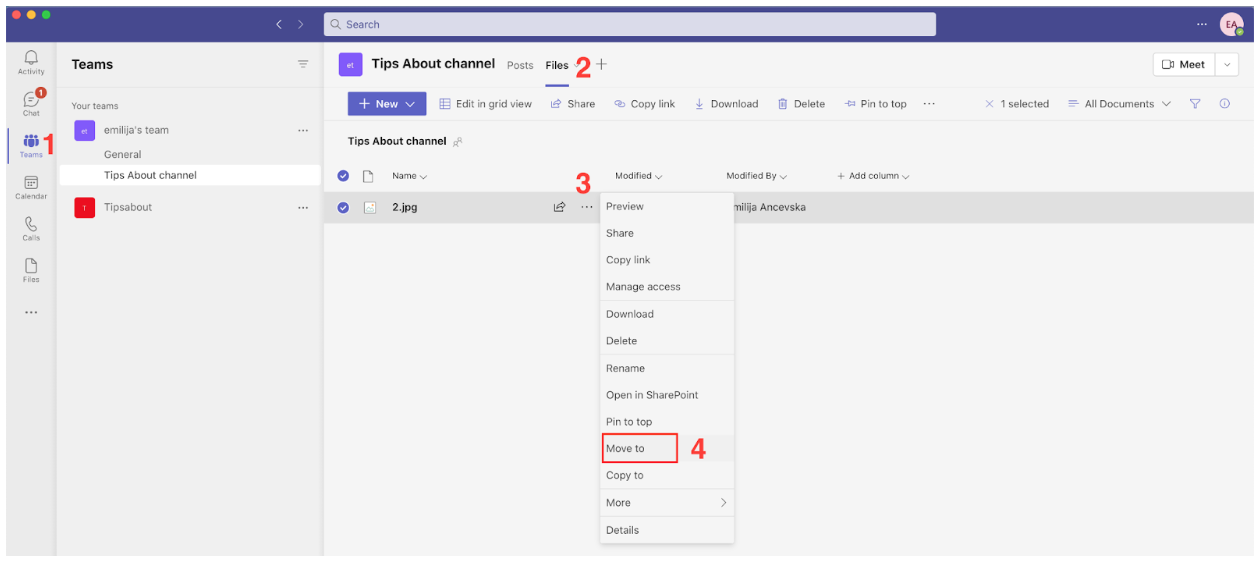
- Open Teams and go to the Files tab in a channel.
- If the file you want to move is in your OneDrive, click on ‘Files’ (left panel of Teams) and choose ‘OneDrive’.
- Click on the three vertical dots to access more options.
- Click on ‘Move to’.
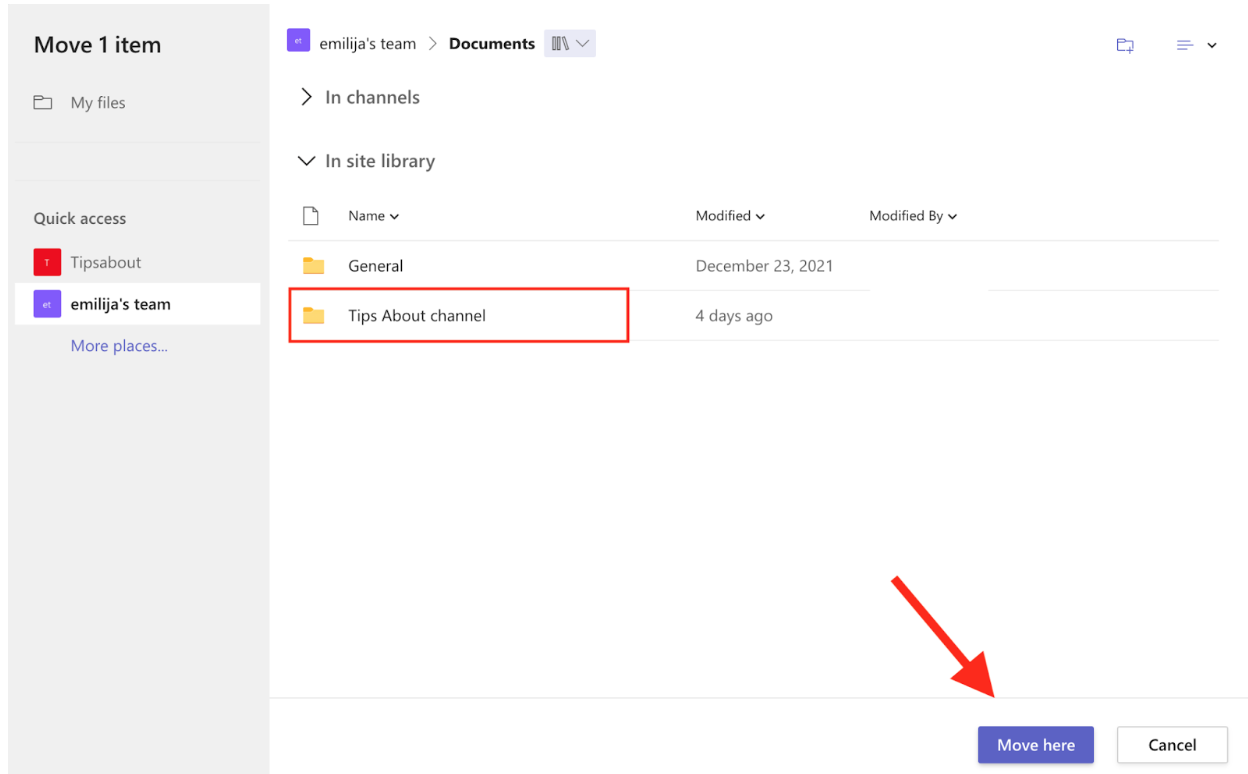
- Select the channel.
- Click on ‘Move here’.
You can move files in MS Teams within the same team, within the same One Drive, and between OneDrive and a team.
Another bonus read: How to export chat from Teams?
How to move files and folders between Teams
You can move folders between Teams channels using Sharepoint because Teams files and folders are stored as Microsoft SharePoint libraries. Therefore, you can use the SharePoint storage to change the folder structure in your Teams channels.
- Launch MS Teams and find the channel from where you want to move files/folders.
- From the upper menu, click on 'Files'.
- Adjust your channel folder structure until you see the folder you want to move.
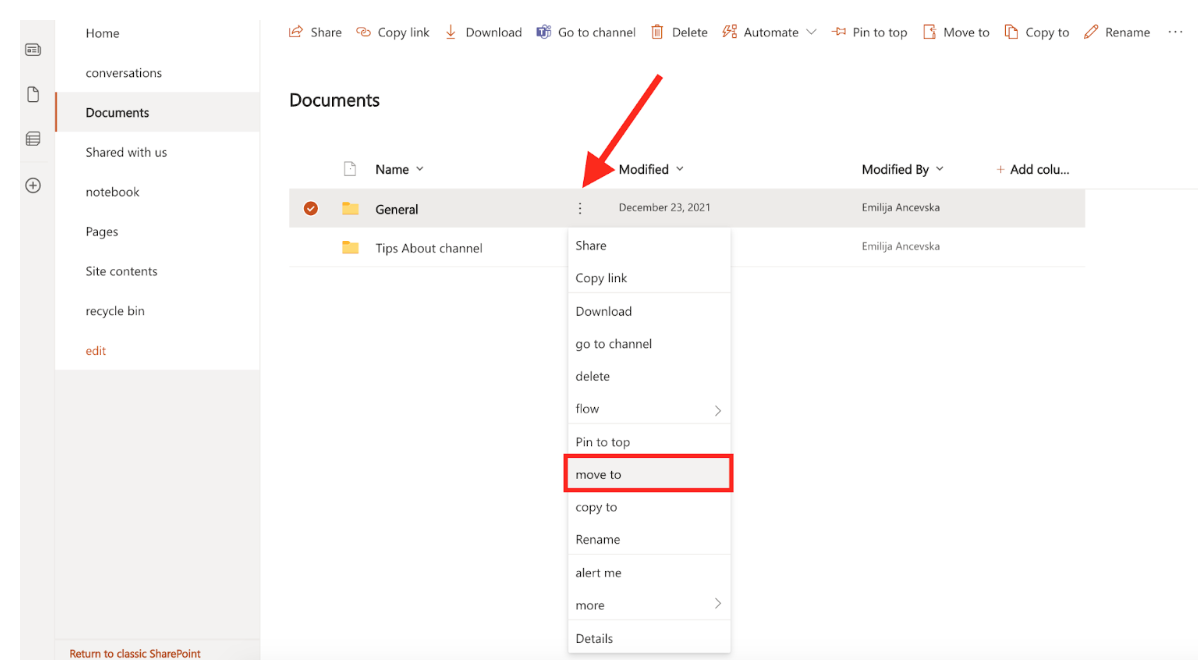
- Next, click on 'Open in SharePoint' (upper right).

- When the SharePoint document library opens, mark the relevant folders you want to move.
- Then, click the three dots icon and select ‘Move to’.
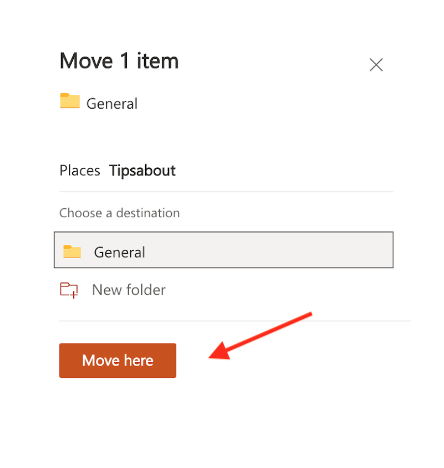
Quick Note: The ‘Move to’ option is also available in your document Library menu, and if you want, you can copy the folder between your Teams from the upper menu or the ‘Show Actions’ section.
- From the right-hand menu, select the team you want, select the channel and click on ‘Move here’.
- SharePoint will give you a notification that you have successfully transferred your folder.
- Go back to your target channel and click on Files to see that your folder has been moved as you wanted.
How to move files from OneDrive to Teams
- Open MS Teams and sign in with your Office 365 account.
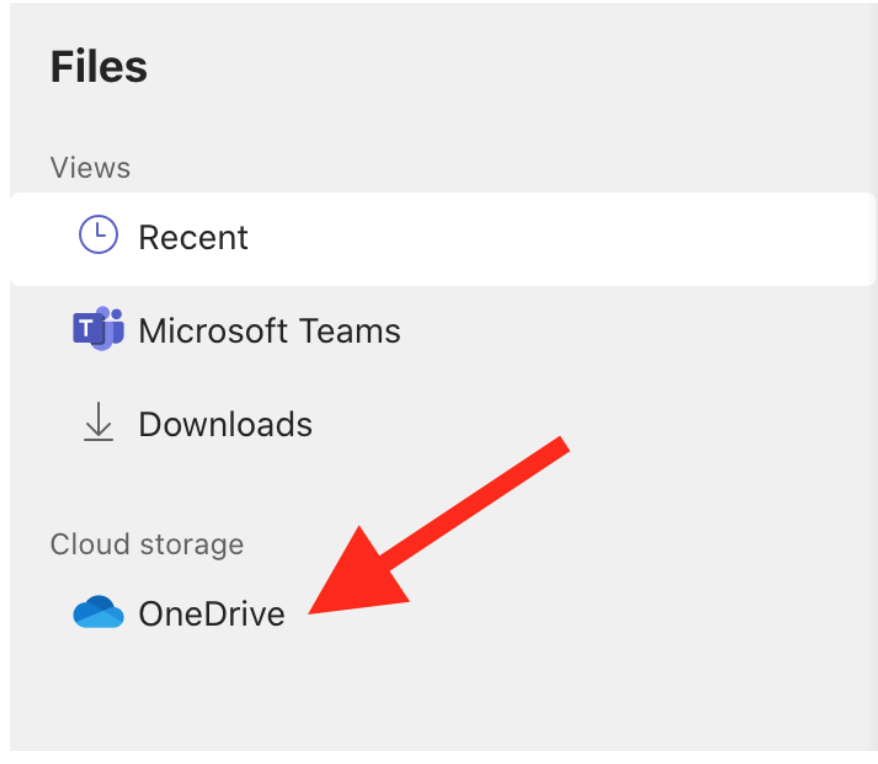
- From the left panel, click on ‘Files’.

- Under Cloud storage, click on 'OneDrive'.
- Select a file and then select the option ‘Move’.
- Then, click on ‘Browse Teams and Channels’.
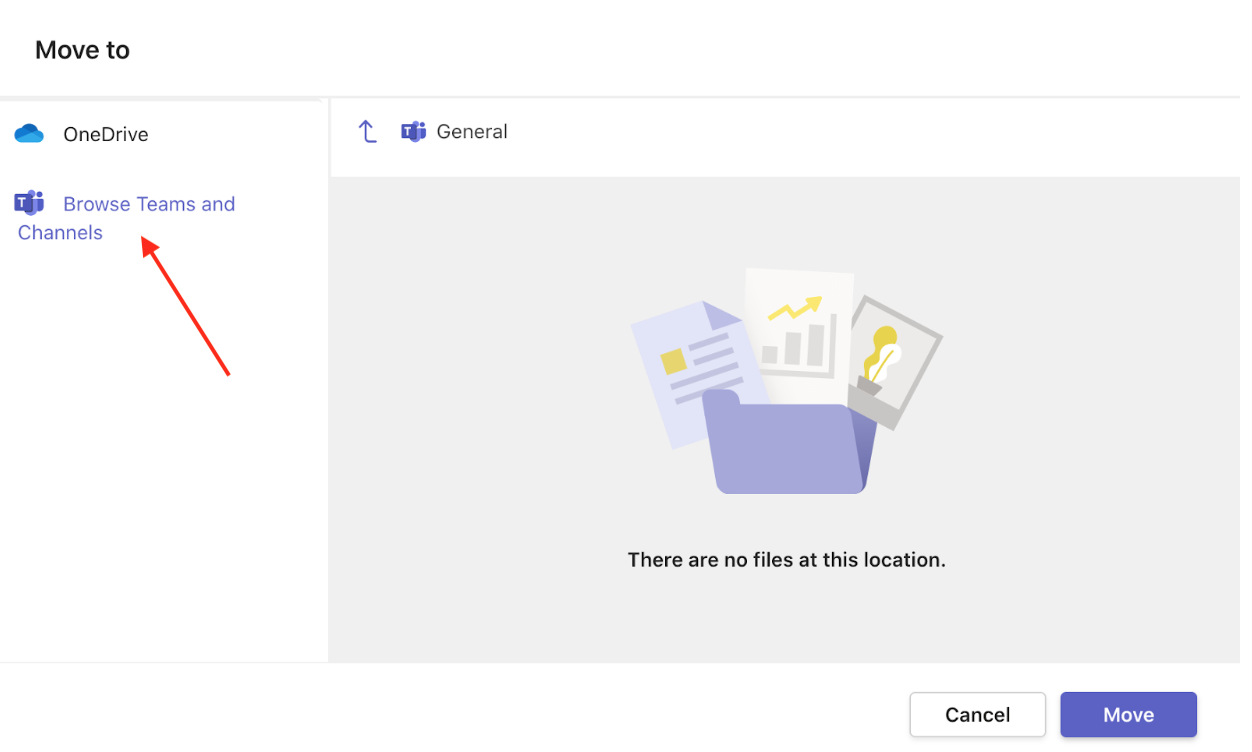
- Choose the location and click on ‘Move’.
- To check this file in Teams, click on ‘Files’.
Why can’t I move folders in Teams?
The files someone shares are not stored in Teams, and the files section displays a view on the folder stored in SharePoint. So, if you want to move files in Teams, you need to use SharePoint and move the files there.
They will show up in the Files tab in Teams, and then you will be able to use the Move option in SharePoint; click on the Files tab > open SharePoint and note the location > navigate to the files you want to move and move them to the location as wanted.
Conclusion
Now, you know that moving files in MS Teams is not as tricky as it seems. The steps to do it are straightforward, and once you get a hold of it, it will be even faster the next time you do it. Hopefully, this guide helped you find the answer to what you’ve been looking for.
You should also explore other options on Teams, like how to add someone to a Teams channel, or perhaps, how to send a message to yourself on Teams - we share steps for those too.
You might also find these articles interesting: