How to Use the Before and After Scan on Instagram 2025
-(2)-profile_picture.jpg)
Written by Ivana Kotorchevikj Social Media / Instagram
With the Before and After Scan, you can use any picture as an After
To use the Before and After Scan on Instagram:
- Tap on the ‘+’ icon at the top-right corner and select ‘Reel’.
- Tap on ‘Effects’.
- Tap on the ‘magnifying glass’ icon to go to search.
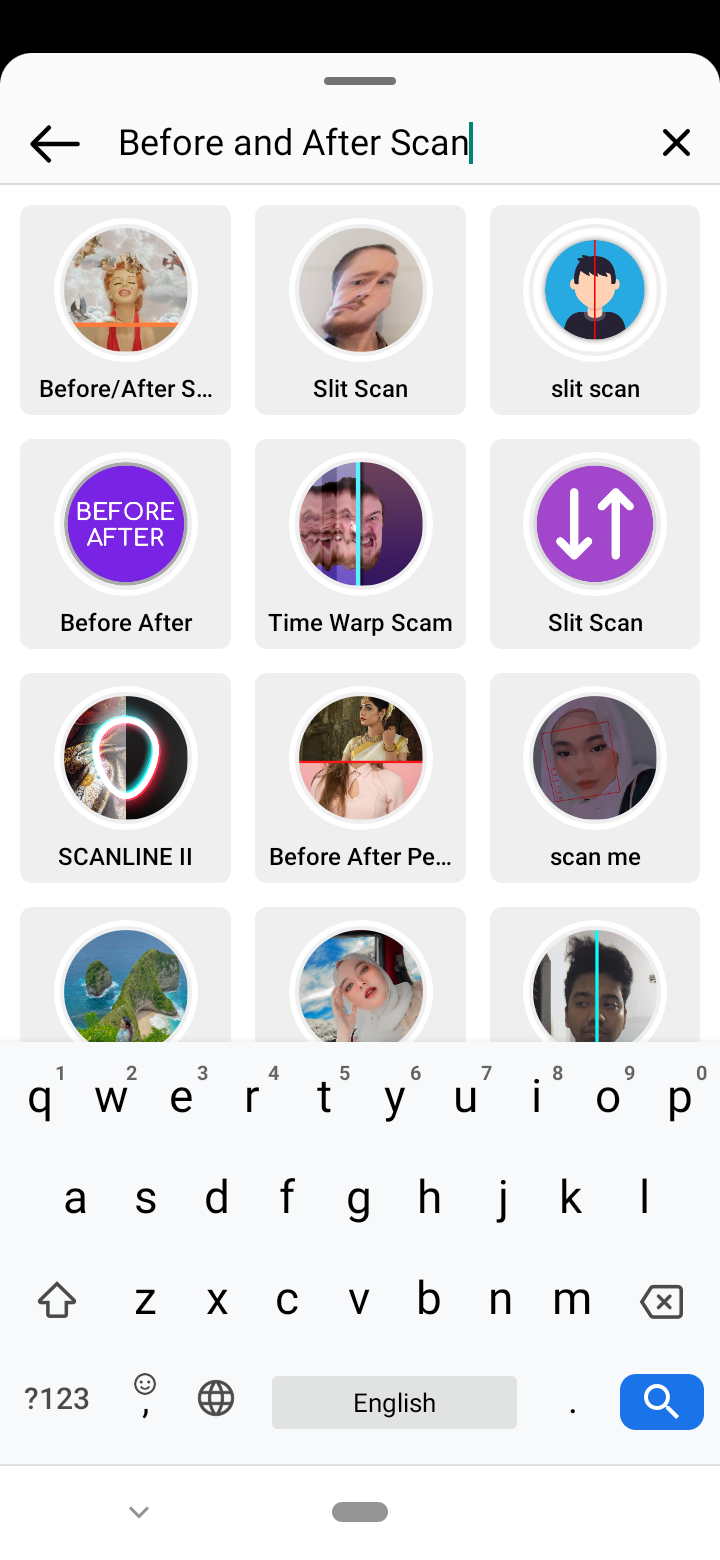
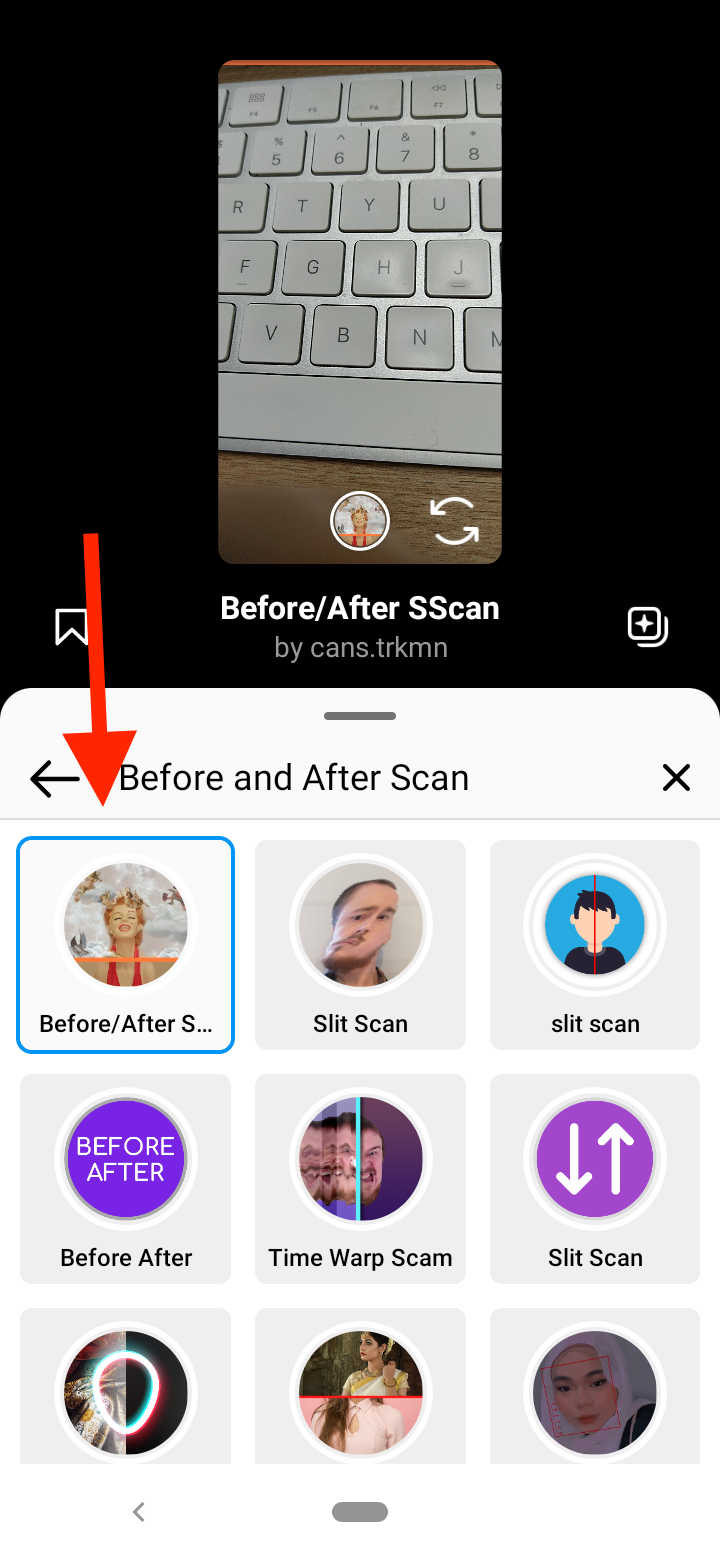
- Search for the “Before and After Scan” and select the first result.
- Then, tap on the ‘Add Media’ icon to add the picture you want the filter to show after the scan.
- Tap on the ‘Record’ button at the bottom to record a video.
The Before and After Scan Instagram filter has recently become a trend. The filter, whose real name is Before and After Sscan, got many Instagram users wondering how they could also join this trend.
Learn how to use the Before/After Scan on Instagram.
What exactly is the Before and After Scan?
The Before and After Scan is a fun filter you should definitely try if you are looking to add more flair to your Instagram posts.
The filter scans your case and shows what your supposed twin or better-looking half looks like. However, the filter doesn’t do that automatically - you have control over what the filter shows as an After. You can select any picture you want, even a picture of your favorite celebrity.
If you want to check out some of the other Instagram filters and effects, explore the Yellow Teeth filter, the Celebrity Look-Alike filter, and the Pixar filter.
How to do the Before and After Scan on Instagram
If you want to join the trend with the Before and After Scan effect, you need to create a Reel and select the effect which scans your face.
- Open the Instagram app.
- Tap on the ‘+’ icon at the top-right corner and select ‘Reel’.
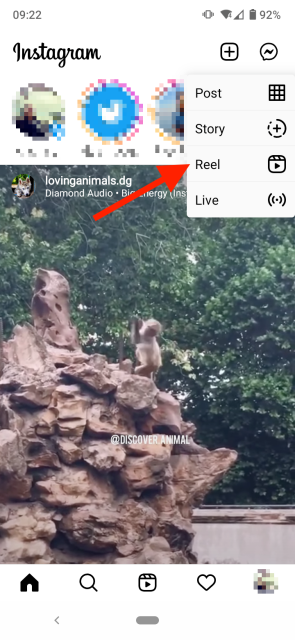
- Tap on ‘Effects’ above the Record button at the bottom.
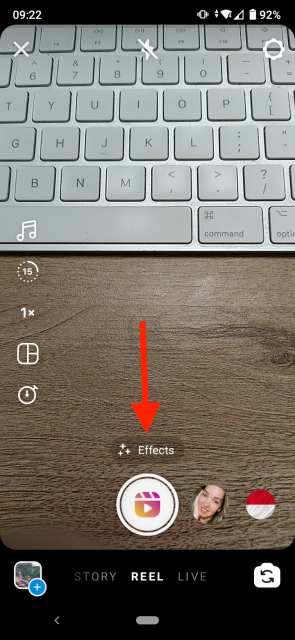
- Tap on the ‘magnifying glass’ icon to go to search.
![]()
- In the search bar, search for the “Before and After Scan”, and select the first filter that comes up in the results.
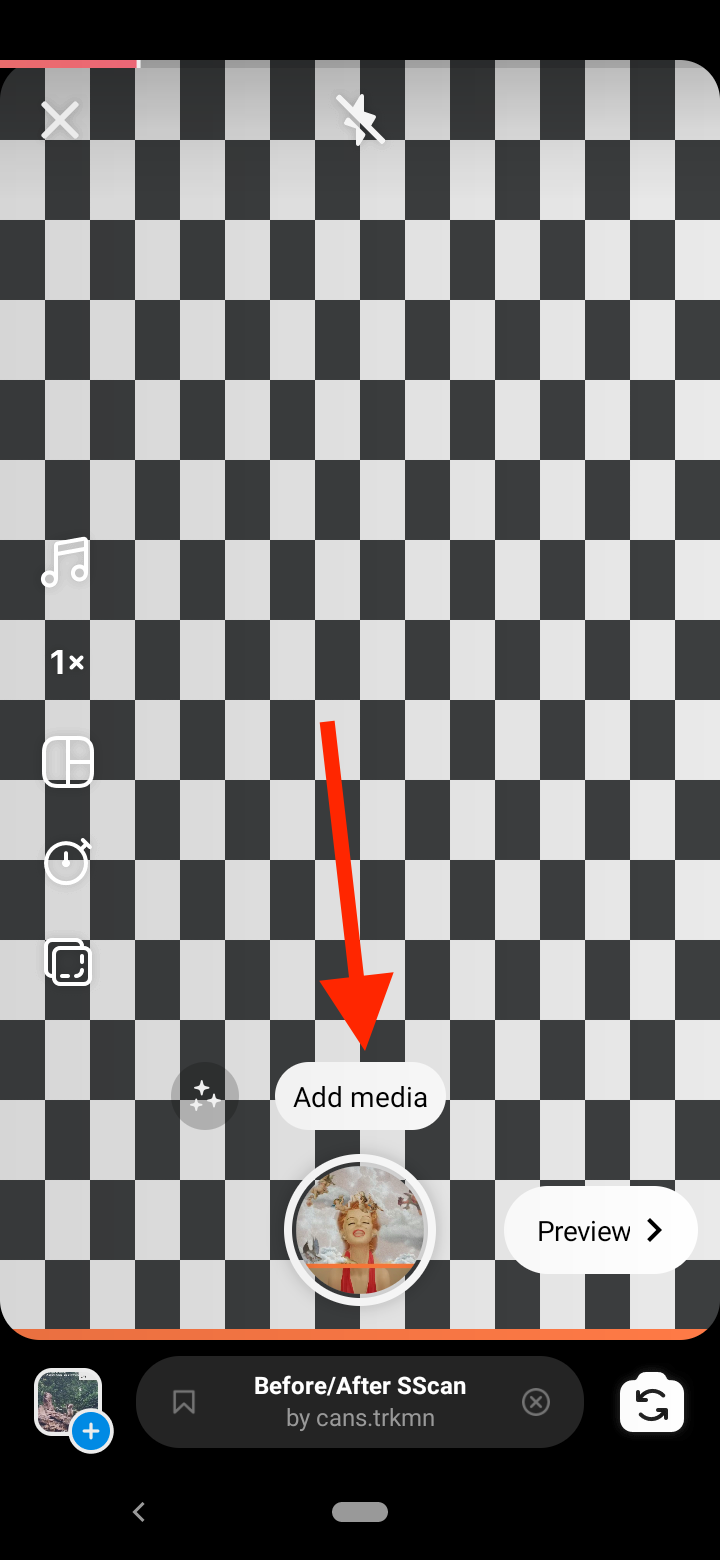
- When the effect shows, tap on the ‘Add Media’ icon to add the picture you want the filter to show after the scan.
- Next, tap on the ‘Record’ button at the bottom to record a video.
Also, you can add music to your video by tapping on the ‘music’ sticker.
How to fix the Before and After Scan not working
Users that had the same issue with the Before and After Sscan not working reported that the Before and After Scan most commonly doesn’t load after uploading the celebrity photo. The screen only displays a black and white box on a black screen.
Also, if you tap on the effect, Instagram will begin to play the video. Then the screen starts scrolling down, but the image doesn’t load.
If you are trying to use the Before and After Scan filter and it’s not working, there are several things you can try to fix it.
Clear the cache in the Instagram app
One of the first fixes you should try if your Before and After Scan filter is not showing up is clearing the cache from the Instagram app.
On Android, open Settings, go to ‘Apps & Notifications’, find Instagram, go to ‘Storage & cache’, and tap on ‘Clear Cache’.
On iPhone, go to Settings > General > iPhone Storage > Instagram. Here, tap on the ‘Delete App’. Now go to the App Store and reinstall the Instagram app.
Add a photo before recording the video
Before you start recording the video, tap on the ‘Add Media’ button to upload a photo of yourself or of a celebrity from your camera roll. After the photo is uploaded, you’ll see the ‘Change Media’ option. Now, start recording the Reel, and the Before and After scan should be working properly.
Log out and log back into Instagram
Another reason why the Before and After Scan is not working may be due to a glitch with the app. To fix the issue, log out of Instagram, delete the app, then go into the App Store or Play Store to reinstall it and log back into the app. The Before and After Scan filter should work just fine.
Update the Instagram app
If logging out and logging back in, and reinstalling the Instagram app, didn’t fix the issue, try updating the app. Sometimes the issue with Instagram filters like the Before and After Scan not showing up may be due to a glitch in the app. Updating the app can help solve this issue.
Go to the App Store or Google Play Store, search for Instagram, and check if there is an update pending.
Wait a bit
Sometimes effects and filters on Instagram may not work because of an issue with the server. If this is the case, the server outage should be resolved after a couple of hours. The only solution is to wait for a while and then go back to Instagram to check if the Before and After Scan functions again.
Give Face and Hand Effects permission
If you have installed a new version of the app, you might need to give face and hand effects permission to be able to use Instagram and filters.
- Open the Instagram app and go to your profile.
- Tap on the menu in the top-right corner.
- Tap on ‘Settings’ and select ‘Privacy’.
- Scroll to the bottom and tap on ‘Face and Hand Effects’.
- Toggle on the ‘Allow face and hand effect’ option.
Now, check if the issue is resolved.
Try the Before and After Scan filter from someone else
If the Before and After Scan filter or some other filter is not showing up when you search it, try adding it from someone else’s Reel.
- Find a Reel in which the user has used the Before and After Scan filter.
- Tap on the filter name found just below the username.
- Tap on ‘Try It’ to use it in your own Reel or select ‘Save’ to use it for later.
If you have issues with other Instagram filters not showing up in 2022 or not working, check out our guide on how to fix it.
Frequently Asked Questions (FAQs)
-
How to get the Before/After Scan on Instagram?
-
The Instagram Before and After Scan is part of the standard Instagram Effects.
Once you have created a reel, tap on the 'Effects' icon and search for Before and After Scan in the search box.
You might also find these articles interesting: