How to Create a Cover for Instagram Highlights
Instagram’s ‘My Story’ feature is extremely specific - stories last for 24 hours only, as opposed to all other types of posting on the platform.
Luckily, Instagram paid attention to the fact that some users don’t want to post some photos or videos as regular posts, but want to keep the stories regardless.
Thus, Instagram created ‘Story Highlights’.
‘Story Highlights’ allow Instagram users to keep their stories indefinitely, instead of removing them from sight after 24 hours, and the limit to how many highlights can be put in a single group is up to 100.
What most users do is group their stories based on context - highlights from a vacation, sunsets, drinks, friends, loved ones.
The feature is widely used, and the highlights are located right below a user’s bio on their profile.
However, plenty of users try to obtain an aesthetic look to their Instagram profiles, and having random highlights cover might be ruining the look.
Luckily, there’s an easy fix. You can change the highlight icons, and keep the aesthetic look of your Instagram profile, keep reading to find out how.
How do I create a highlight?
Before going into details about changing the cover template of your highlight, read through the steps below to find out how to create a highlight first.
- Open your profile by clicking the profile icon in the lower-right corner.
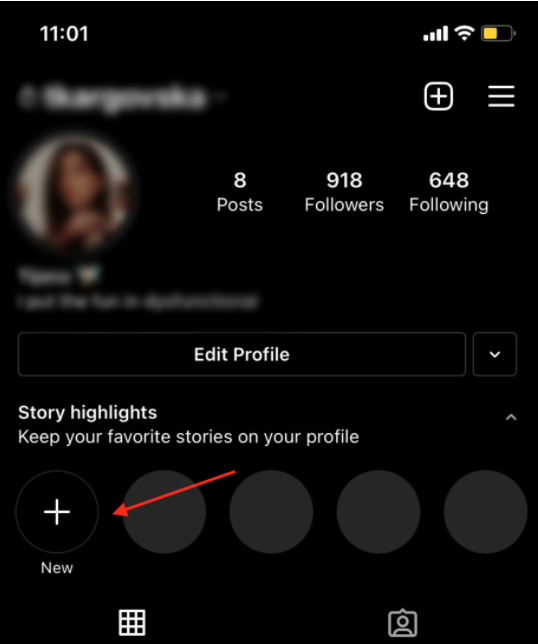
- On your profile, under your bio, click on the ‘Highlights’ icon that has a ‘+’ on it, and is labeled as ‘New’.
- You will be redirected to your ‘Stories Archive’, where you can choose from stories you previously shared to be added to your Highlights.
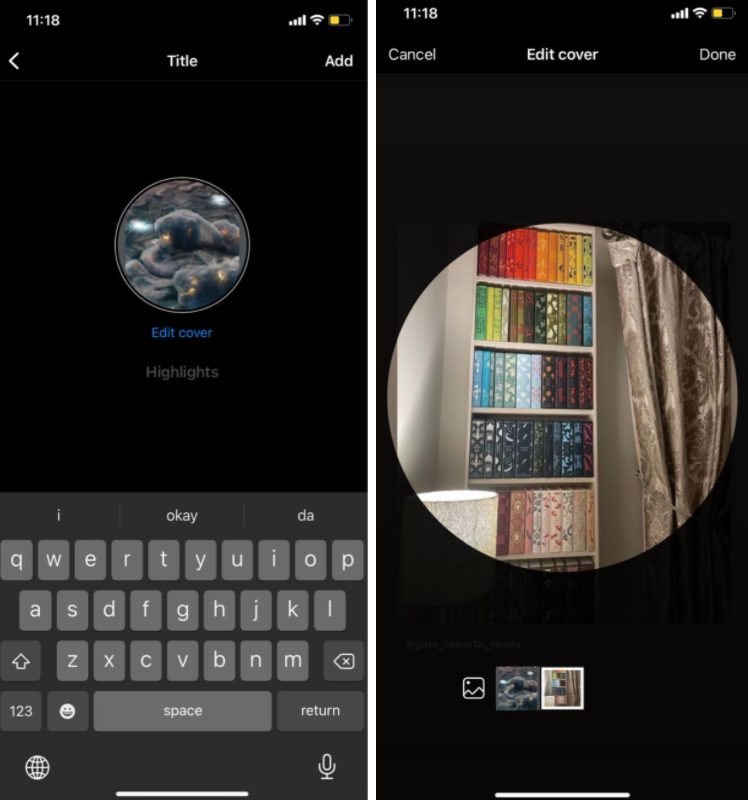
- After selecting all past stories you want to add to a highlight (both photos and videos), you will be redirected to a page where you can give the Highlight a ‘Title’, and choose the cover of the Highlights.
Note: Choose whichever cover temporarily. In the following section, we will guide you through the process of adding a custom cover template to your Highlights.
How do I create a custom cover template?
In order to use a cover photo as a Highlight cover template, you’ll need to either download photos with pre-made graphic designs or create them yourself.
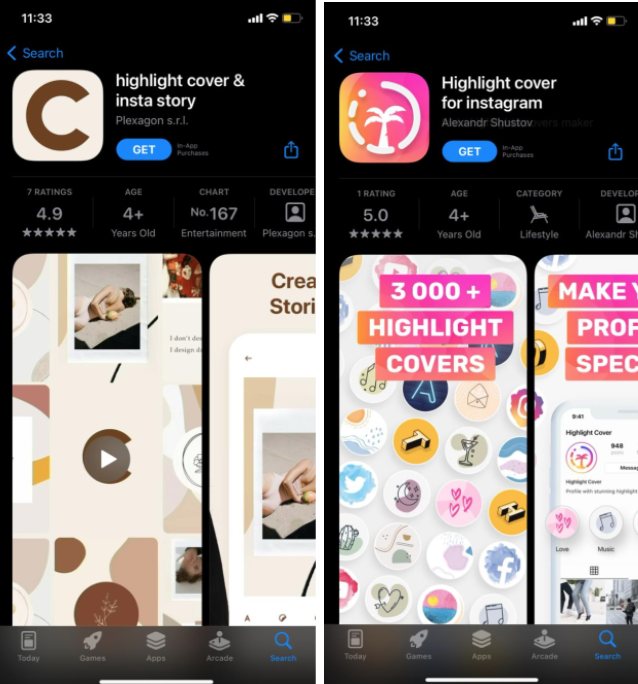
There are plenty of apps on both the App Store for iOS users, and on Google Play for Android users, which are offering colorful matching templates, so you can add similar ones to all your story highlights if you have more than one.
Note: There are apps which are offering pre-made custom templates, but some of these apps also offer for you to create templates yourself.
Creating a custom template yourself
As we mentioned, there are apps you can find on the App Store/Google Play Store which offer you to create the templates yourself.
Bear in mind, however, most of the apps that are available on the App Store and Google Play offer in-app purchases. The good news is, most of these apps offer a free-trial period ranging from 1 to 7 days, so you can use that trial period to make your templates.
The process of creating them might vary from app to app, however, follow these steps to create them yourself:
- Open the App Store/Google Play, and find an app you like. You can search by typing in ‘Instagram Highlights’ and a list of apps will show up.
- Download the one you like, and launch the app.
- Find a background color you like to use for your cover template, and look through the sticker packages if you want to add a sticker on top of the background.
- Find and click the ‘Download’ icon, for most apps, it’s located in the top-right corner of the app, and the photo will be saved to your gallery.
Note: After downloading the cover photo, we will go through the steps of adding it as your Instagram Story Highlights Cover. Therefore, if you want to have a custom photo for each individual highlight, create as many cover photos as you have highlights on your Instagram profile.
Downloading pre-made cover templates
For those users who don’t feel like creating templates themselves, you can also download pre-made templates.
- Open the App Store/Google Play, and find an app you like. You can search by typing in ‘Instagram Highlights’ and a list of apps will show up.
- Download the one you like, and launch the app.
- Scroll through the pre-made templates until you find one that you like. If you have multiple highlights you want to add templates to, a big percent of these apps have templates that are similar to one another, so you don’t ruin your profile’s aesthetic.
- Find and click the ‘Download’ icon, for most apps, it’s located in the top-right corner of the app, and the photo will be saved to your gallery.
How to edit the cover on Instagram Highlights
These will be the final steps, and after finishing these steps, you will finally be done.
- Open the Instagram app, and go to your profile.
- Tap and hold on one of your highlights you want to make changes to.
- From the drop-down menu, select ‘Edit Highlight’.
- In the following screen, in the upper part of the screen, click on ‘Edit Cover’ right below the photo cover you previously selected.
- Click on the photo icon to make changes.
From your library, choose the template you downloaded, and click ‘Done’ in the top-right corner of the screen.
You might also find these articles interesting:
