How to Change Thumbnail on YouTube
Written by Ivana Kotorchevikj Streaming / YouTube
The YouTube thumbnail is the first thing viewers see about your video, and it plays a big role in people’s choice to click on your video.
When you upload a video on YouTube, it auto-generates several pre-selected thumbnails you can choose from, or lets you upload your custom-made thumbnail.
If you’ve already uploaded the video, but you are not satisfied with the low-quality auto-generated thumbnail or want to change it for your own custom thumbnail, the good news is that you can - even if the video is already published.
In this article, we’ll walk you through how to change the thumbnail on a video that’s already been published and how to add a custom thumbnail while publishing a video.
How to change a thumbnail on YouTube for a published video
Your account doesn’t allow you to upload a custom thumbnail by default. In order to enable the custom thumbnail option, you need to verify your account. Verifying your account will also allow you to upload videos longer than 15 minutes, live stream and appeal content ID claims.
It could be also helpful to check out how to turn on comments on your YouTube videos.
Follow these steps to verify your account:
- Sign in to your YouTube account and click on your profile picture in the top-right corner, and select ‘YouTube Studio’.

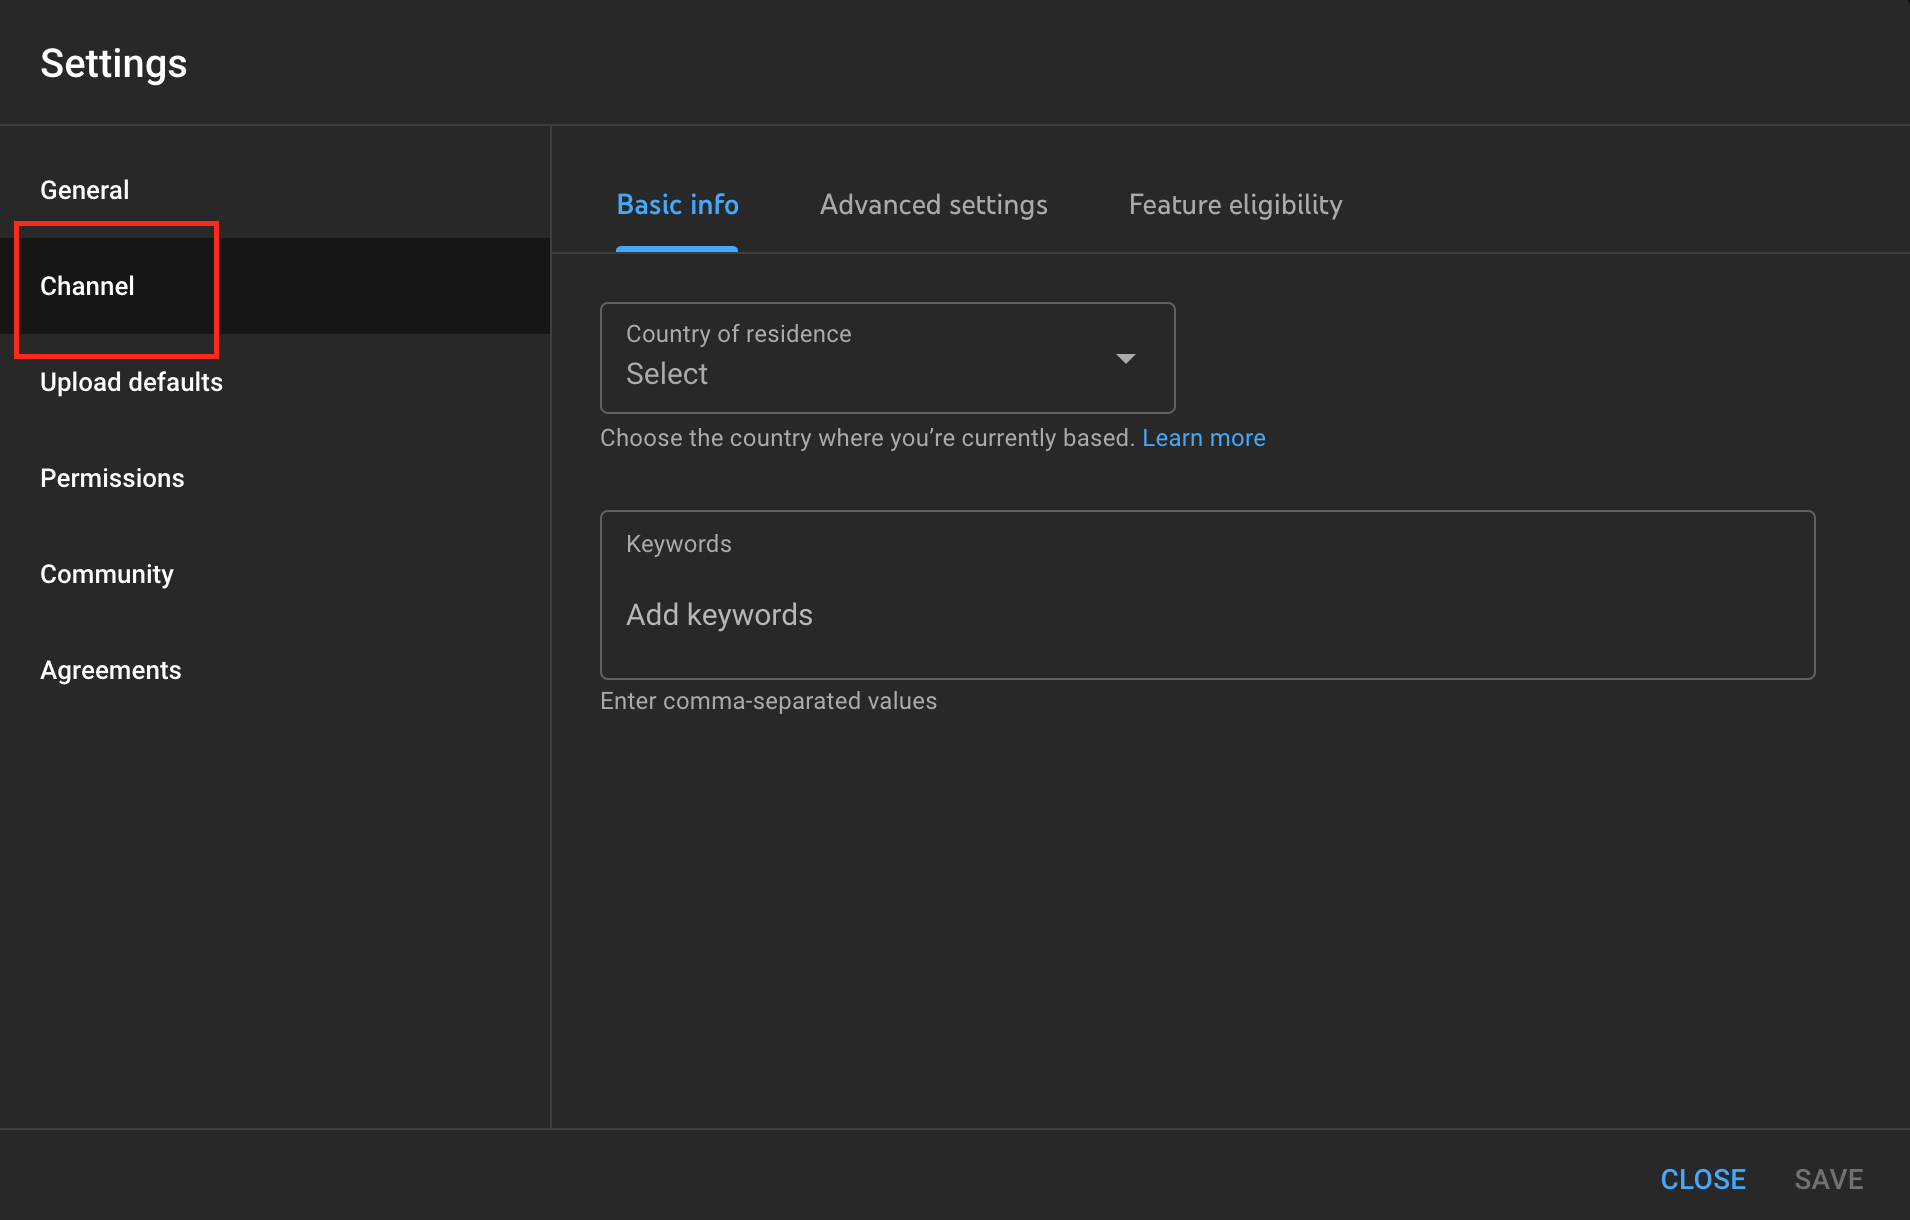
- Click on ‘Settings’ in the left-hand side panel.

- Go to ‘Channel’, and click on ‘Feature Eligibility’.
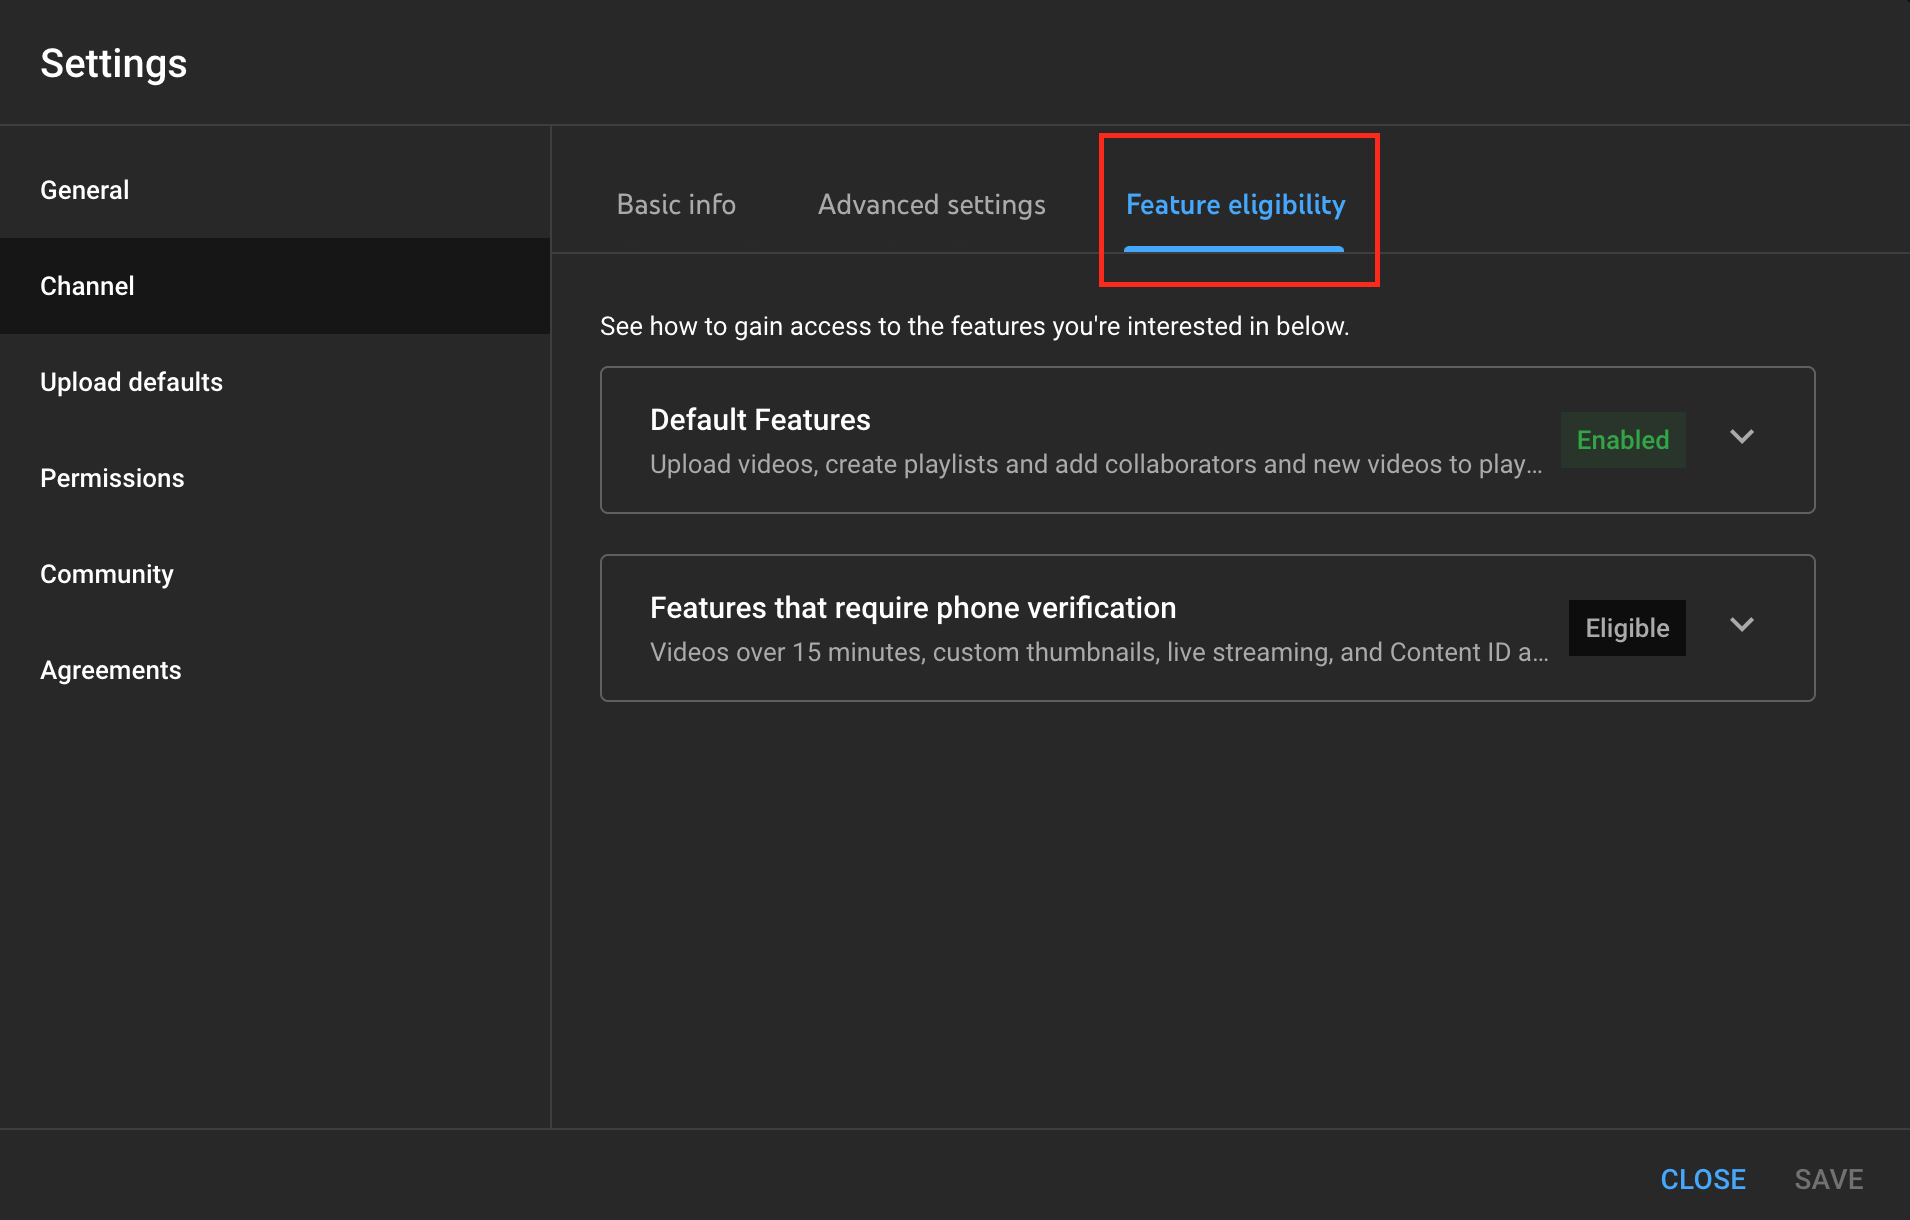
- In this window, you’ll see two fields: Default features and Features that require phone verification. Click on the ‘Enable’ button next to Features that require phone verification.
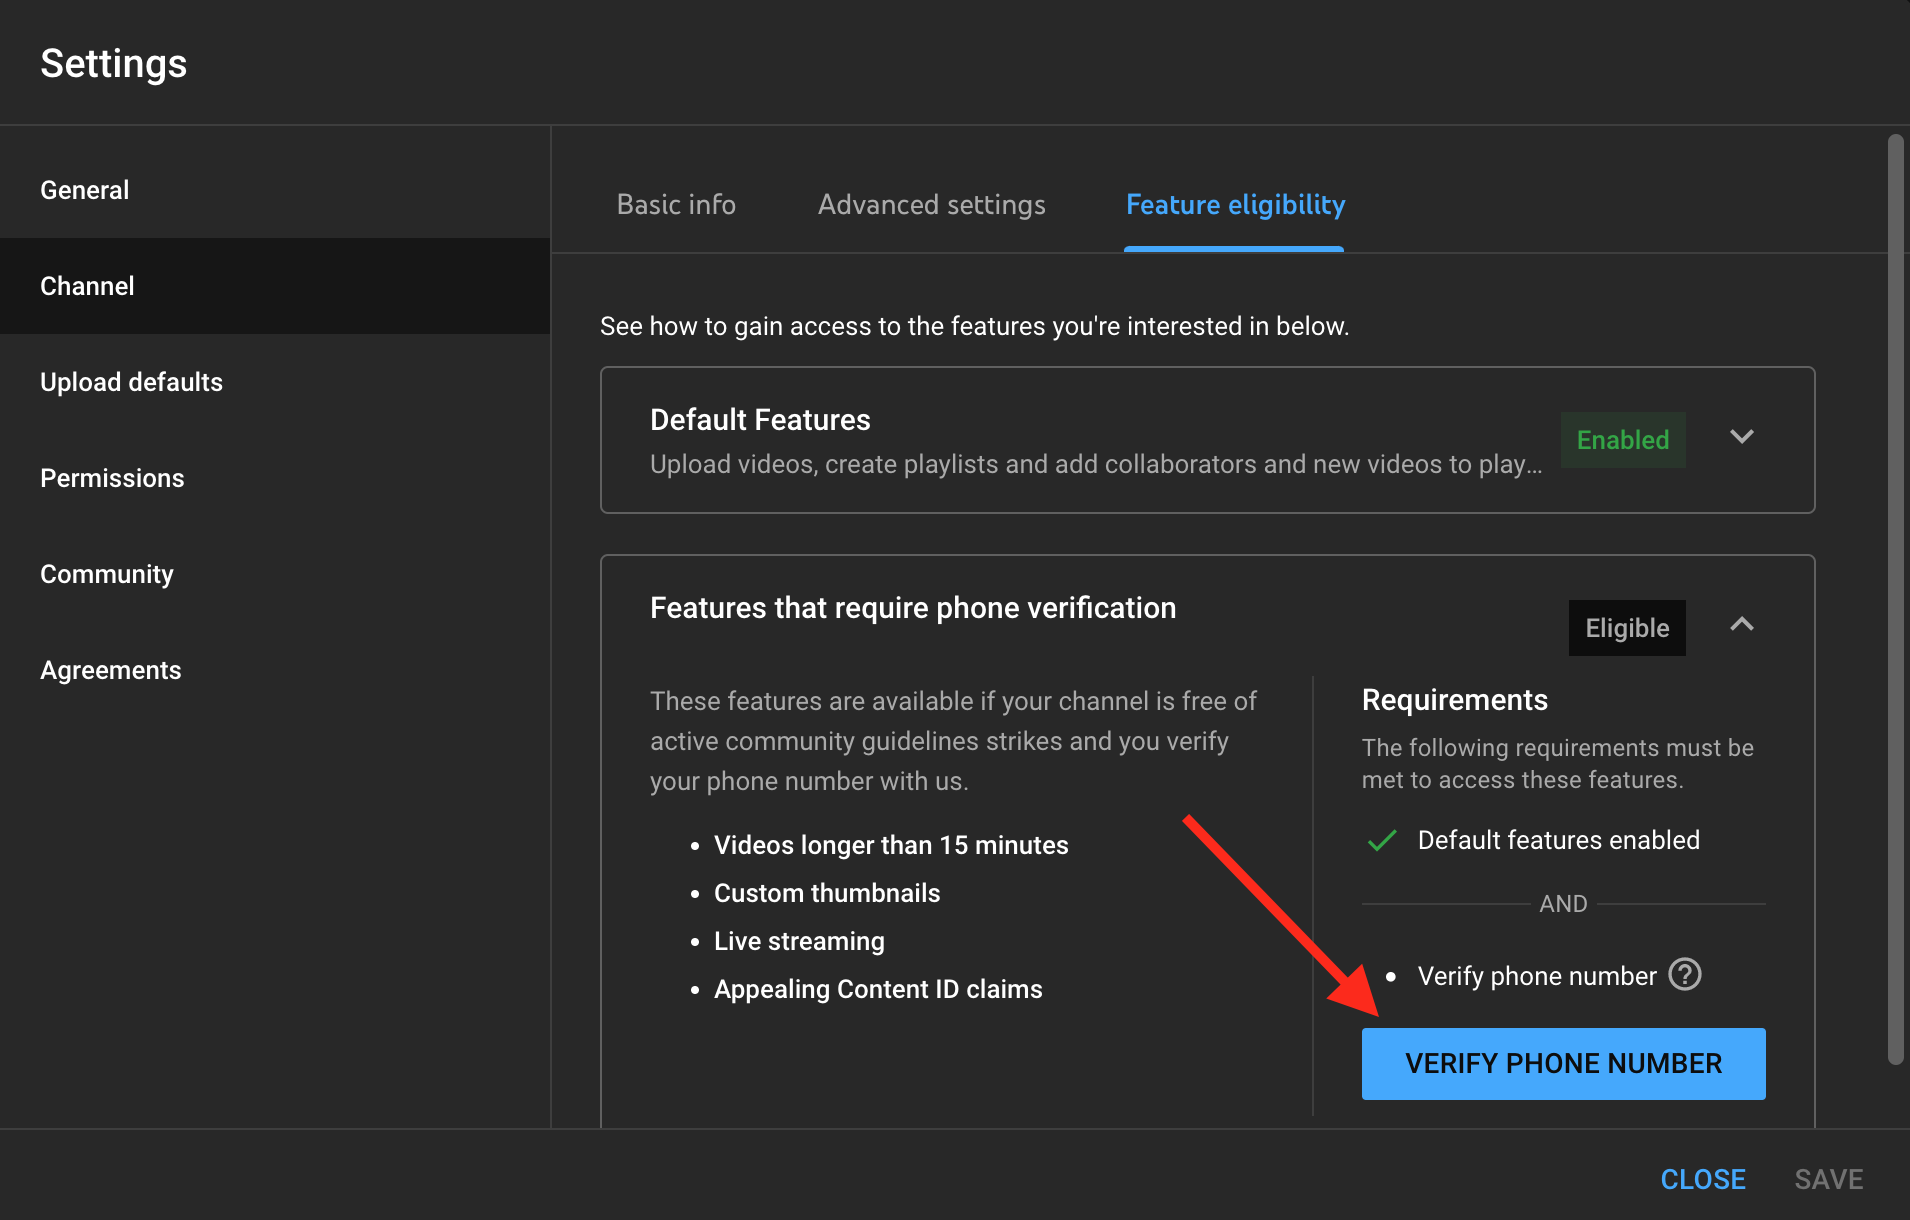
- When the field opens, click on ‘Verify phone number’ to enable these features.
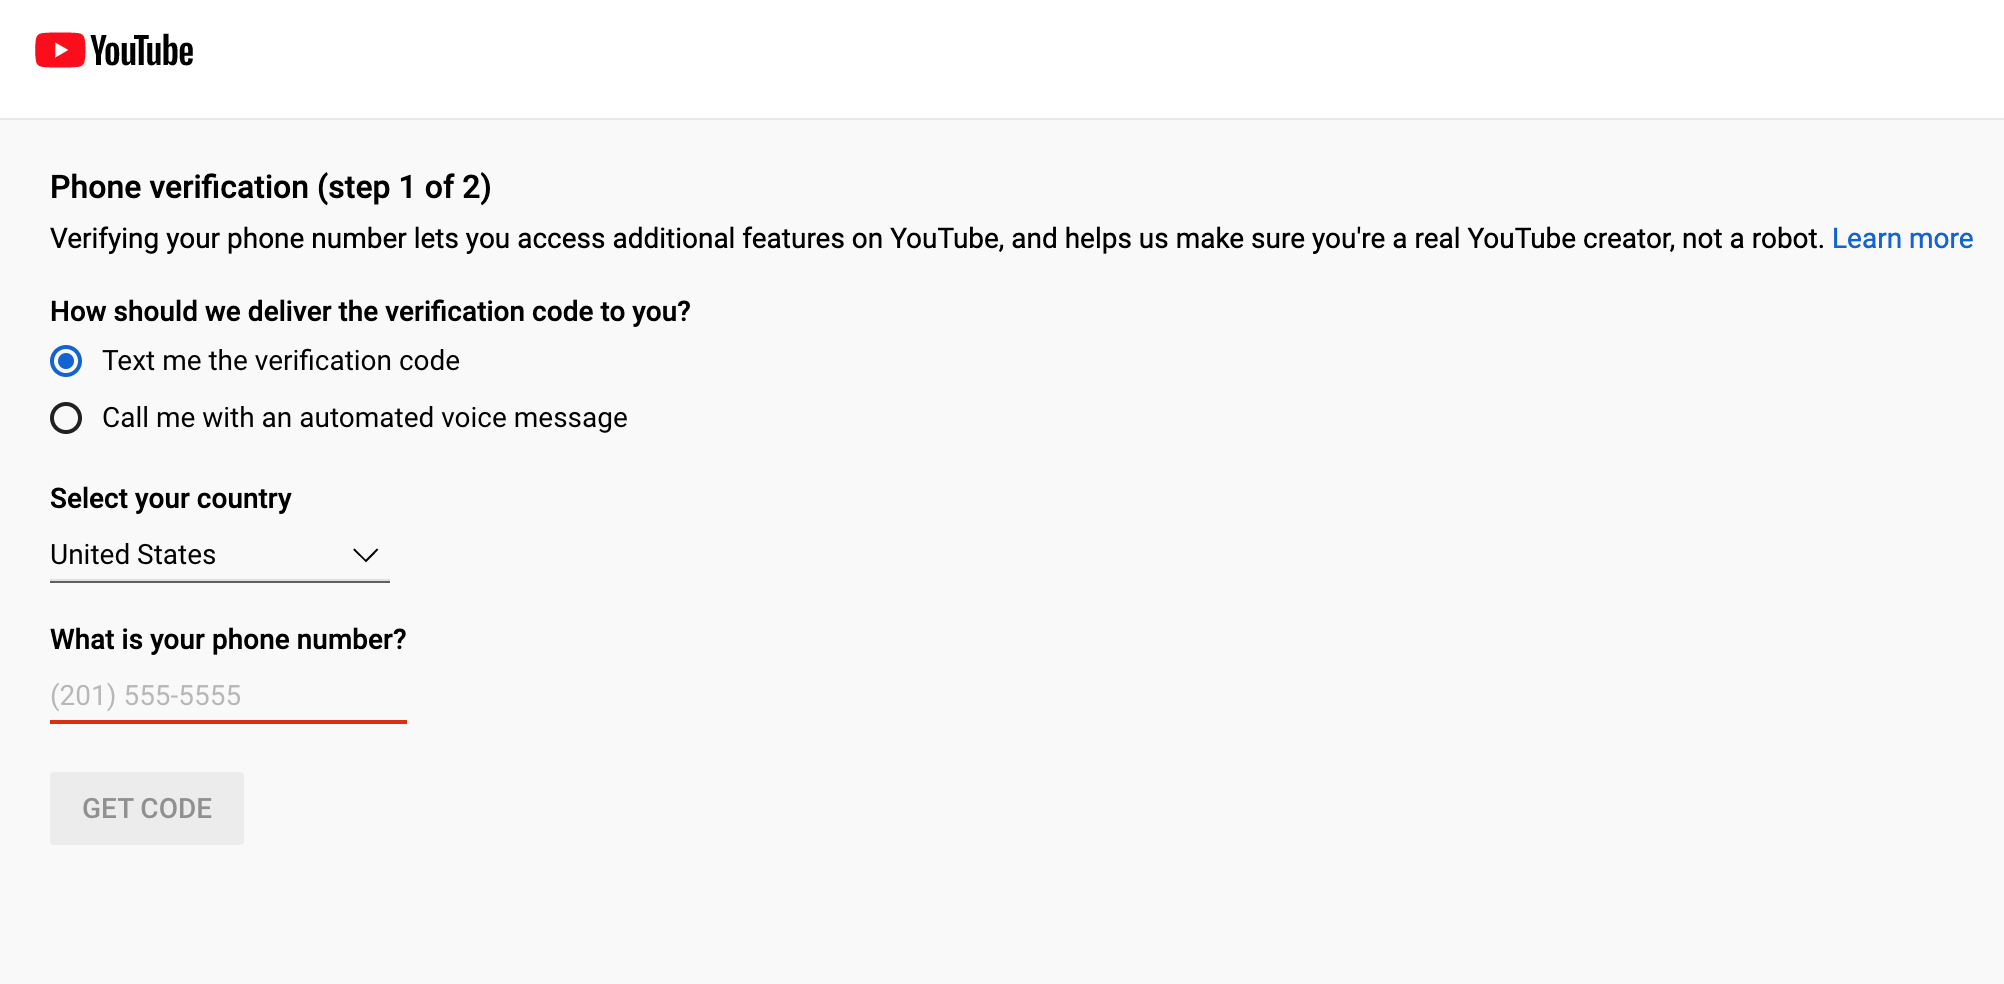
- You’ll be taken to a Phone verification page. Follow the steps to complete it.
When you’ve verified your profile with your phone number, you can upload a custom thumbnail to your videos by following these steps:
- Again go to YouTube Studio.
- Select ‘Content’ from the left-hand side panel.

- From the video list, click on the title or thumbnail of the video for which you want to change the thumbnail.

- On the next screen, find the Thumbnail section just under the Description. Under the Thumbnail section, you’ll see three auto-generated thumbnail options and a button on the left that says ‘Upload thumbnail’. Click on this button to upload your custom thumbnail.
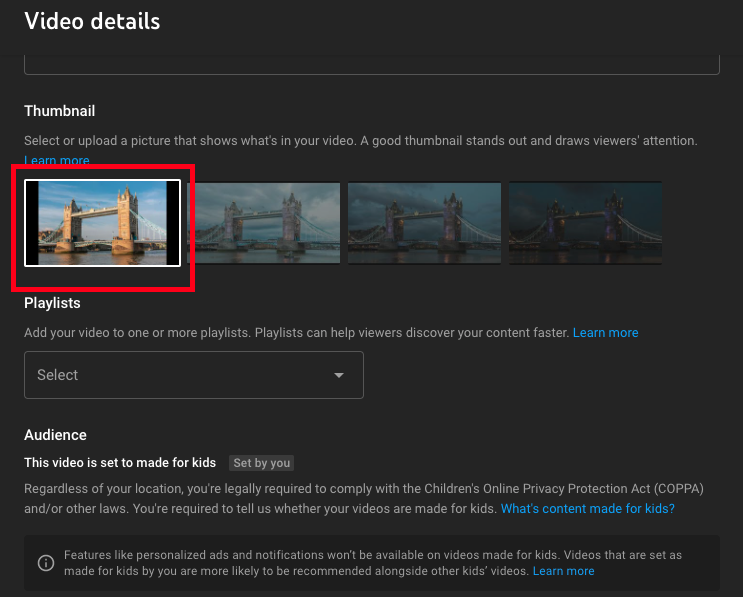
- Select the image you want to upload and click ‘Open’. Make sure your image is optimized for YouTube Thumbnail Size: 1280 pixels wide and 720 pixels tall, is under 2 MB, is in PNG format and follows the 16:9 aspect ratio.
- Click on ‘Save’ in the top-right corner of the page.
When you go to your Channel content, you will see the new thumbnail on the video.
How to upload a custom video thumbnail while publishing a video on YouTube
Uploading a custom thumbnail image when you are in the process of publishing a video is really easy.
- First, go to YouTube Studio > Content to upload a video.
- Click on the camera icon on the top right corner of the YouTube screen and click on upload video.
- When the video uploads, scroll down to the bottom of the page to the section ‘Thumbnail’.
- You’ll see three auto-generated thumbnails - screenshots from the uploaded video. You can select one of them as a thumbnail. If you want to upload your custom thumbnail, click on the ‘Upload thumbnail’ button on the left of the suggested thumbnails and select an image to upload.
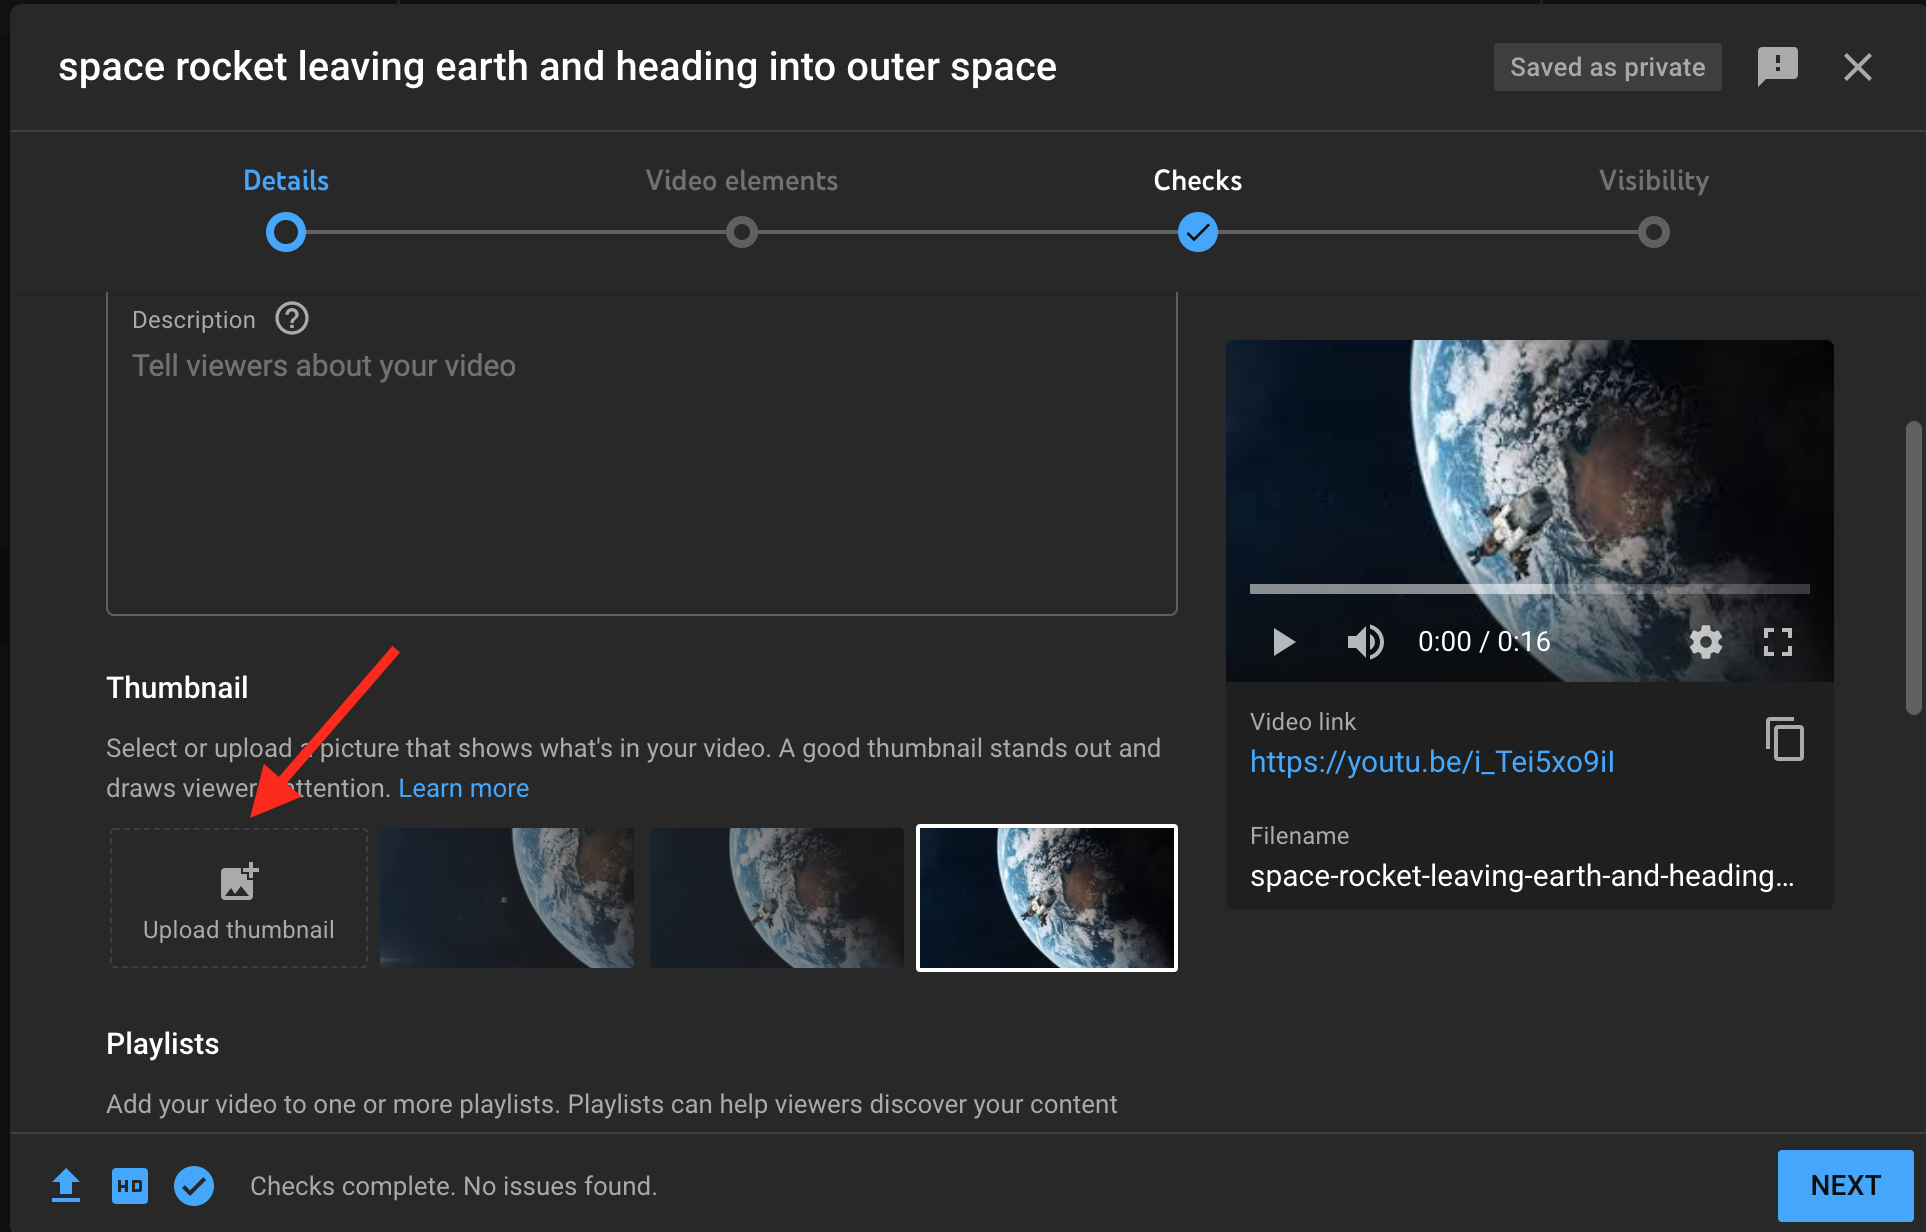
- When the image uploads, complete the rest of the steps for the video uploading. At the last Visibility step, you’ll see a preview of the thumbnail.
- When you are done with all the video details and are happy with the thumbnail, click on the ‘Save’ button in the bottom-right corner of the screen to finish uploading the video.
And you are done! You’ve uploaded the video with your custom thumbnail. Now sit back and watch it bring in the desired clicks, views, and subscribers.
Also, check out how to change the banner on your YouTube channel, or if you are using TikTok, you can learn how to change the thumbnail there - we have a full guide on that too.
-(2)-profile_picture.jpg)
