How to Turn on Grid on iPhone Camera
-(2)-profile_picture.jpg)
The iPhone's built-in camera app is a great way to take photos and videos, but it offers a few additional features that can be helpful in certain situations. One of these is the ability to turn on the grid. This can be useful for framing shots or aligning objects in the scene.
Turning on the camera grid on your iPhone also allows you to use the ‘rule of thirds’ to take great pictures.
The grid creates a grid of lines that help you take a straight picture by keeping the focus horizontal and vertically aligned.
Below, we’ll discuss the ‘rule of thirds’ and how turning on the grid on your iPhone camera can help you take amazing photos with perfect balance.
What is the ‘rule of the thirds’ and the how the iPhone camera grid enables it
The rule of thirds is all about picture balance. It states that the important compositional elements in a photo should be placed along the lines or at the intersections of the lines.
The horizon line (of your photo) should line up with the top or bottom horizontal line of the grid to create a perfect balance in the shot.
And this is where the camera grid plays an important role. It splits the screen into nine squares of equal size, making it super easy to align the objects and create balance in your photo.
Bonus: How to turn off the flashlight on iPhone 12
How to turn the grid on iPhone camera
If you tried to look for the grid option in the camera app and couldn’t find it, it’s because it’s not found in the camera settings, contradictory as it may be.
Instead, the option that enables the grid is in the device settings. But, it’s easy to turn the grid on and off within settings every time you need.
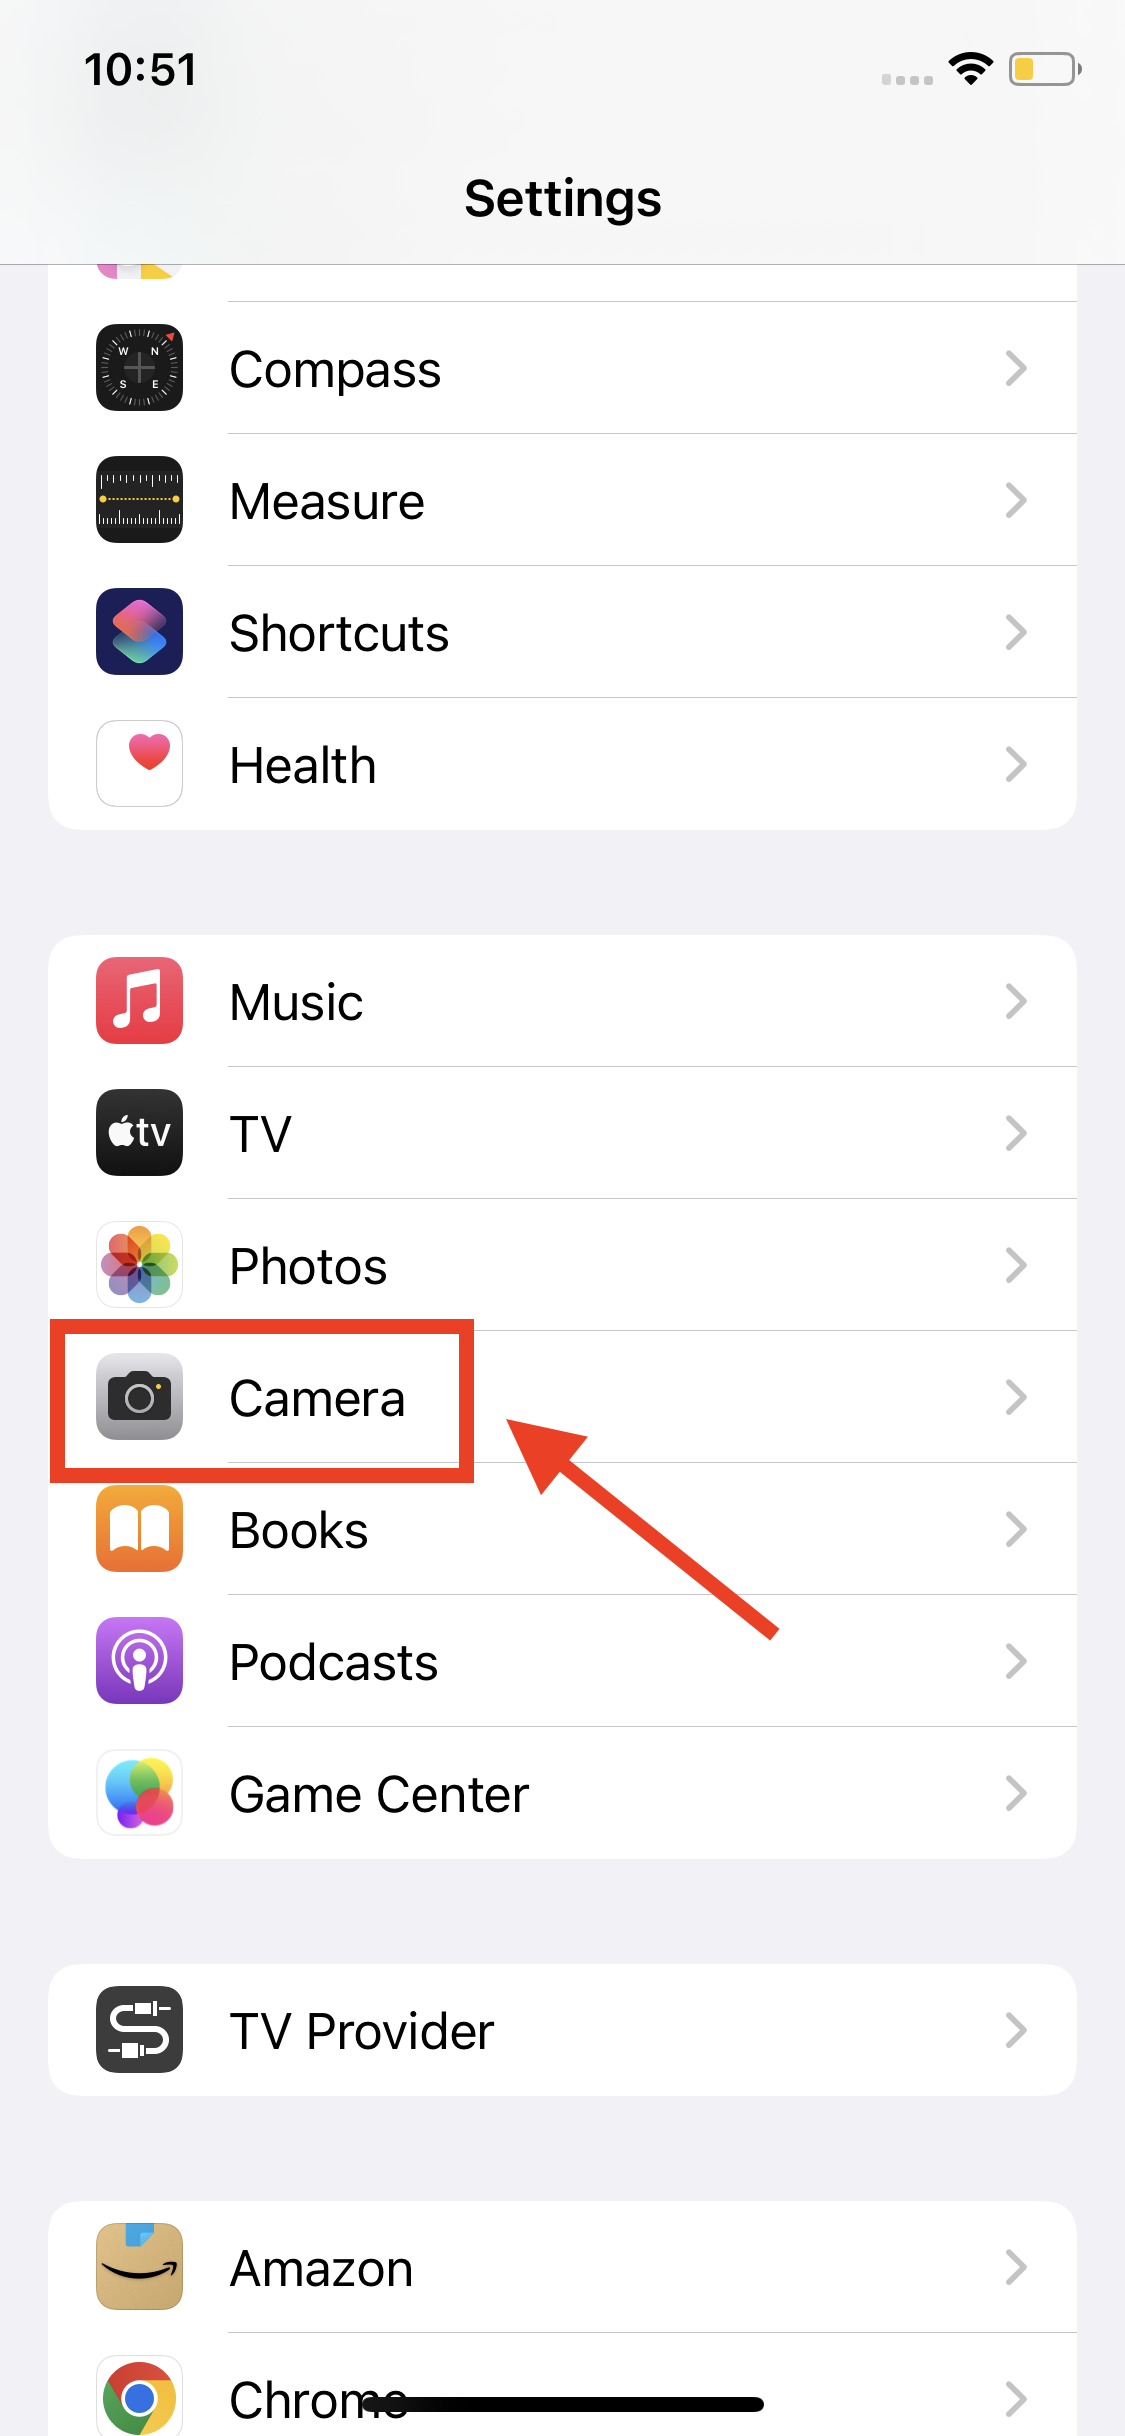
- Open the Settings app on iPhone.
- Find and open ‘Camera’ (or ‘Photos & Camera’ if you are using an older version than iOS 11).
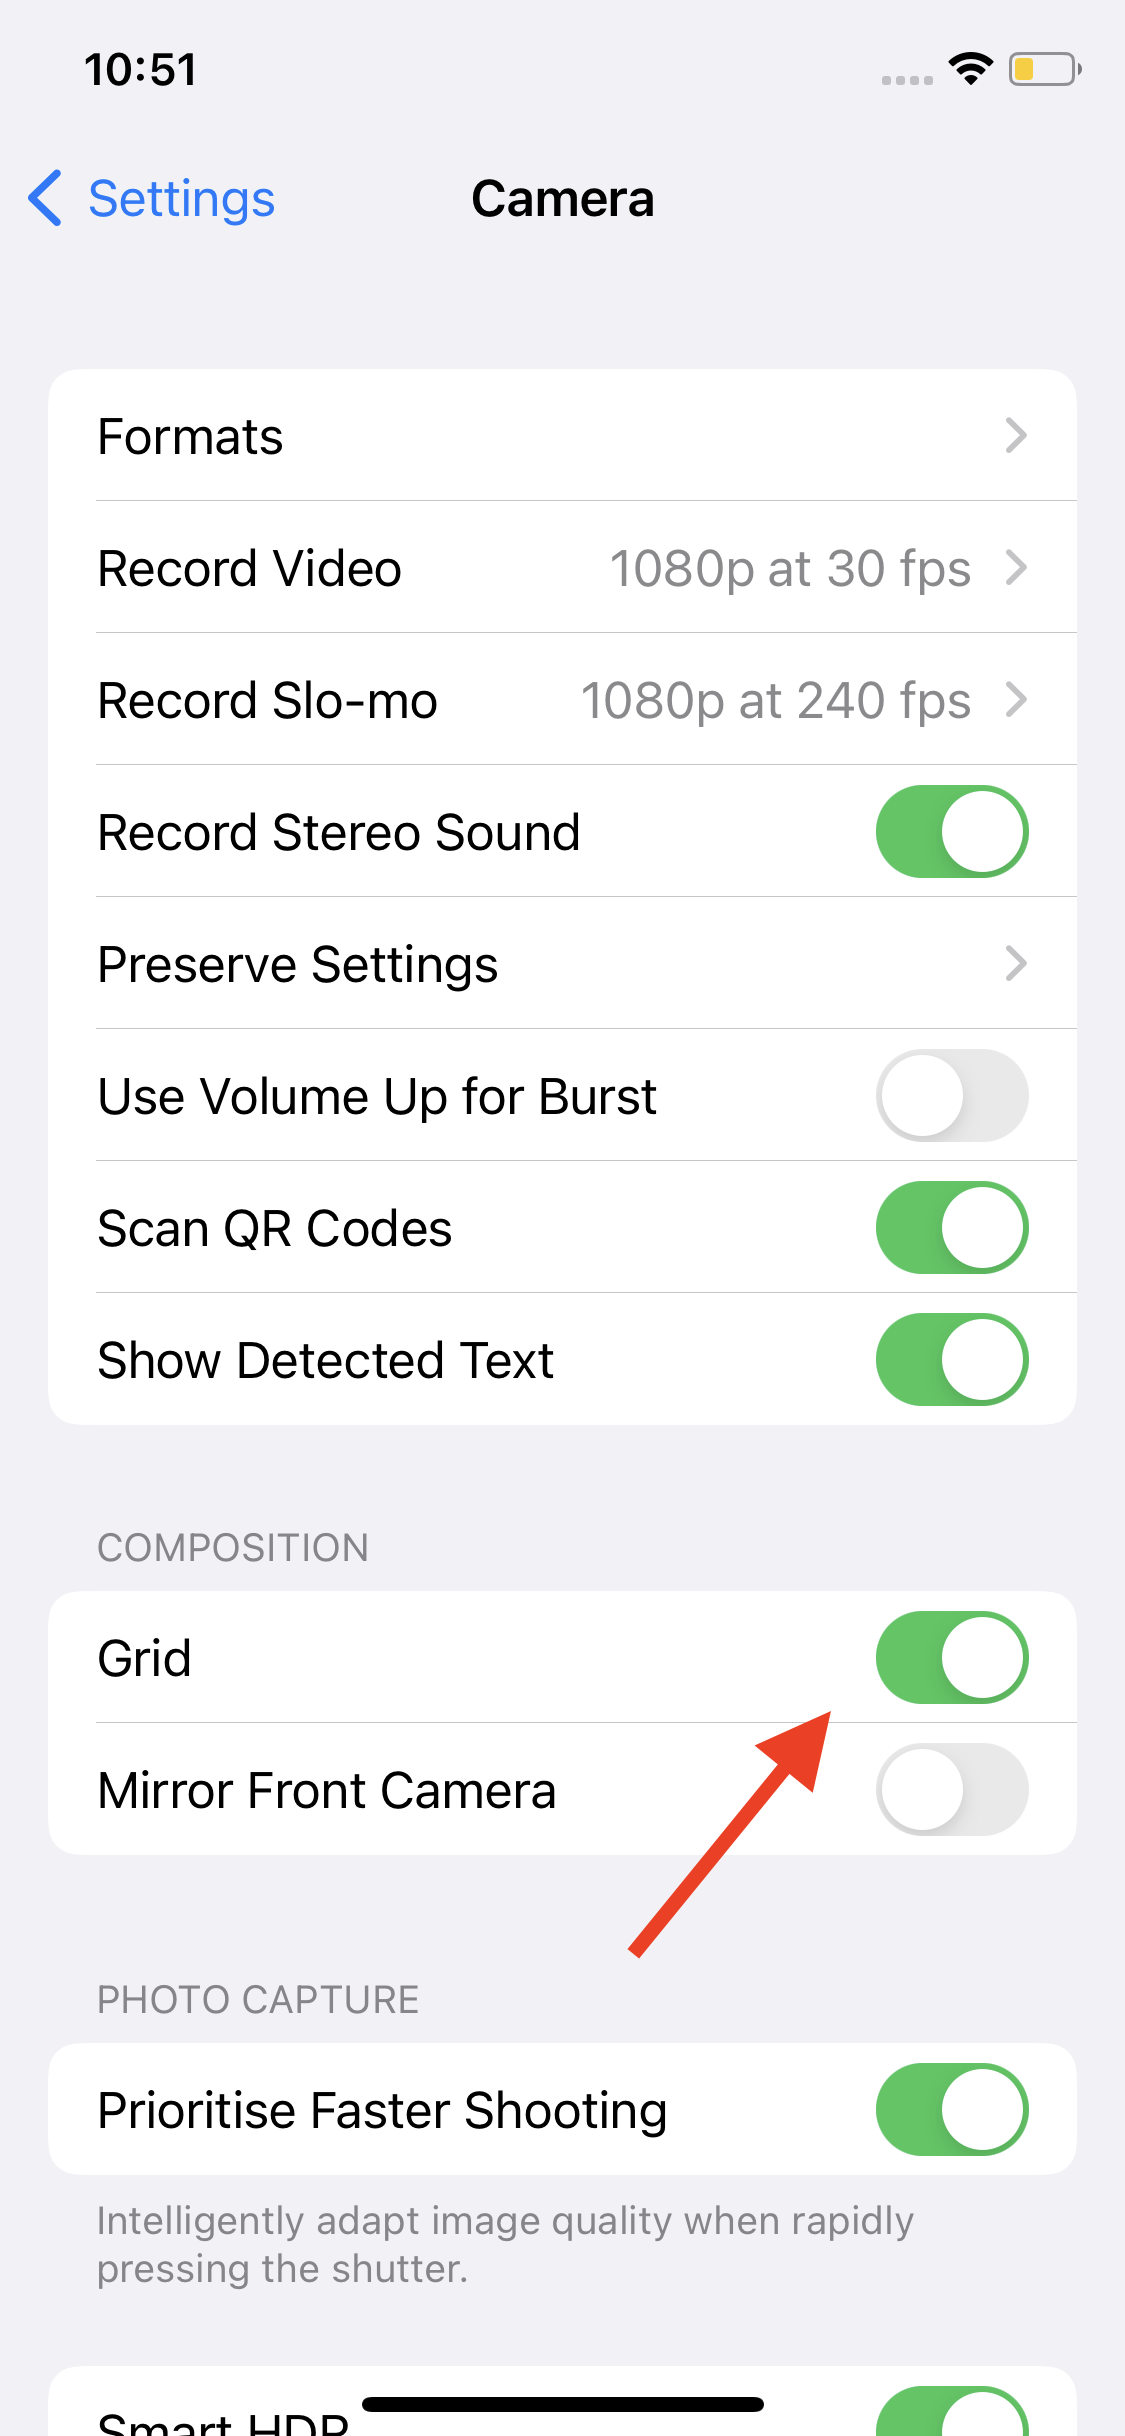
- You’ll find the ‘Grid’ option under the Composition section. Just switch the toggle next to it to enable it.
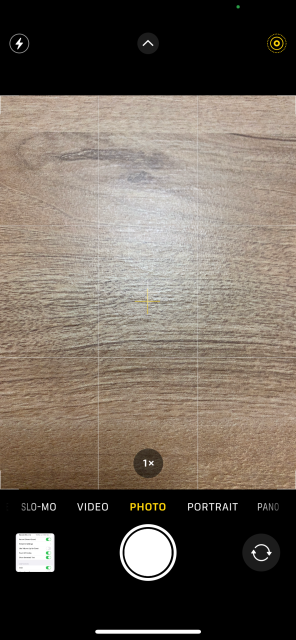
- Now go back to the Camera app. You’ll see a faint grid over the capture frame.
- If you want to turn off the grid option, just go to Settings > Camera and toggle off the switch next to ‘Grid’.
Taking photos with an iOS camera comes really close to taking professional photos with a DSLR camera. Although the iPhone camera app can’t completely replace a professional camera, it offers great features like a grid to help you turn your amateur photos to the next level.
Knowing how to turn on the grid on the iPhone camera and use it properly can also help you create more professional social media content for your channels.
If you are interested in reading about more iPhone tips, check out how to split screen on iPhone.