How to Fix: FaceTime Photos not Saving
FaceTime is the most popular method for iOS devices to communicate via audio and video.
The app launched a long time ago, and the FaceTime video calling platform has only been getting better and more sophisticated.
Although the platform is native to Apple devices only and can be used by iPhone, iPad, or Mac users, its amazing features still bring more than 125 million users on a daily basis.
As we mentioned, the platform keeps getting updated, and one of the best features it currently offers is taking live photos directly from the app while being on a call.
FaceTime has a shutter button, which is used for this exact purpose. The photos are saved directly to your Camera Roll, and you can access them from there.
However, a lot of users experienced issues with live photos not saving.
Reportedly, at times the photos taken using the Shutter button on FaceTime, do not save in the Camera Roll.
Luckily, there are several solutions to this issue.
We created a step-by-step guide to help you fix your FaceTime problem.
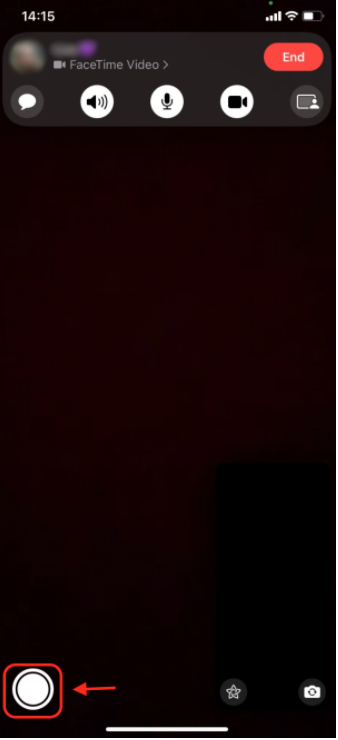
How do I fix FaceTime not saving photos?
As we mentioned, there are several possible reasons why this is happening. However, the issue is easily fixable, so keep reading to find out how to solve the problem.
FaceTime Photos not enabled
Due to safety regulations which we’re sure you understand, in order for photos to be captured while using FaceTime, both parties need to have the feature enabled.
Therefore, if you’re trying to take a Live Photo of the call you’re on, the other user needs to have taking Live Photos enabled on their phone. Otherwise, you will receive a ‘FaceTime Photos must be enabled on both devices to use this feature’ notification.
- To check if you have it on or not, open your phone Settings.
- In the Search Bar, type in FaceTime or find the app manually.
- Find and tap ‘FaceTime Live Photos’
Updating the software on your device
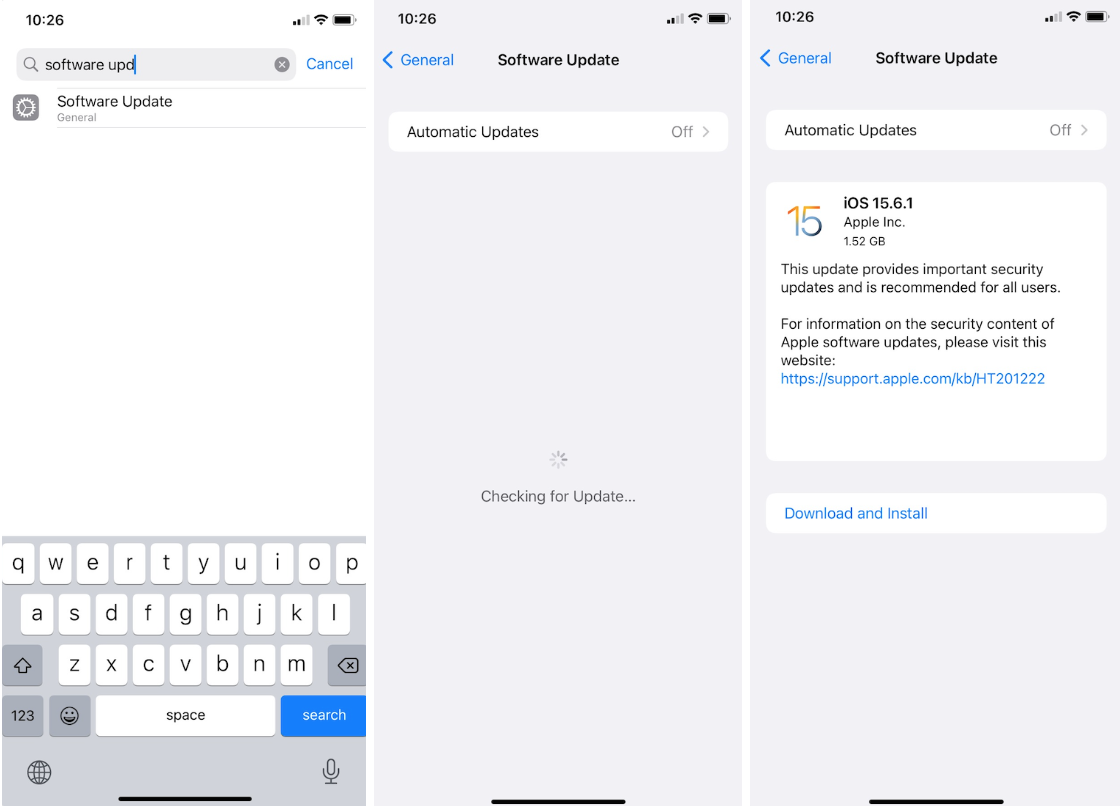
If your iPhone or iPad is running on an older iOS, this may cause issues such as this one. In order for FaceTime to function properly, your iPhone needs to be running on iOS 12, or your iPad on iOS 13.0 or higher.
To check for any possible software updates, open your phone Settings, and in the Search Bar, type in Software Update. For those users who haven’t updated their software for some time now, the Software Update notification will be on the top of your Settings options.
Check your Camera Roll
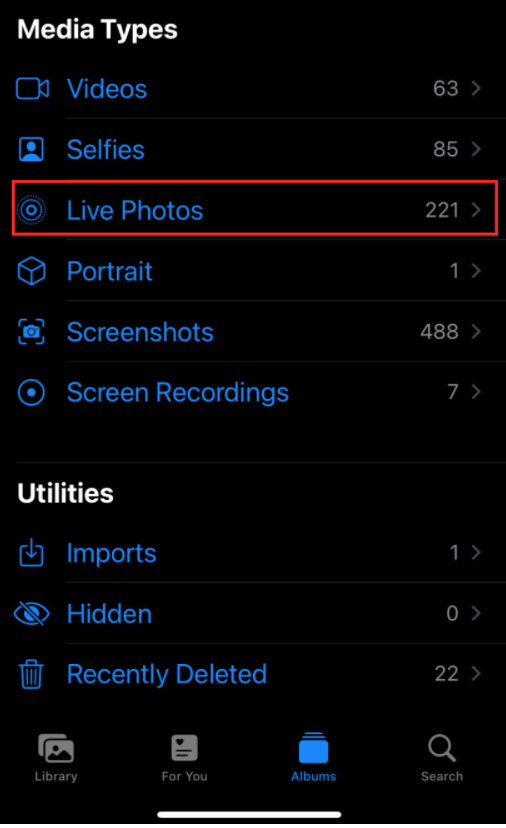
The Live Photos that are taken from FaceTime cannot be accessed from the app.
You’ll need to open the photos app, and either go to the whole gallery or open the Live Photos album.
Double-check if the photos are saved there, but you haven’t seen them.
This is a common misunderstanding, especially for users who swipe through their gallery from the ‘Albums’ section, instead of the whole gallery.
Restarting the device
Same as with all other apps, platforms and devices, glitches are bound to happen. The glitch might be due to FaceTime, it might be due to an issue with your phone, or it might be an issue with the Internet connection. Whichever the reason is, force restarting your device can fix this issue.
To restart your iPad or iPhone, click and hold the side button and either volume button at the same time.
Hold until the 'Power Off' screen shows up, slide the slider to the right, and hold the power button again until the Apple logo shows up on the screen.
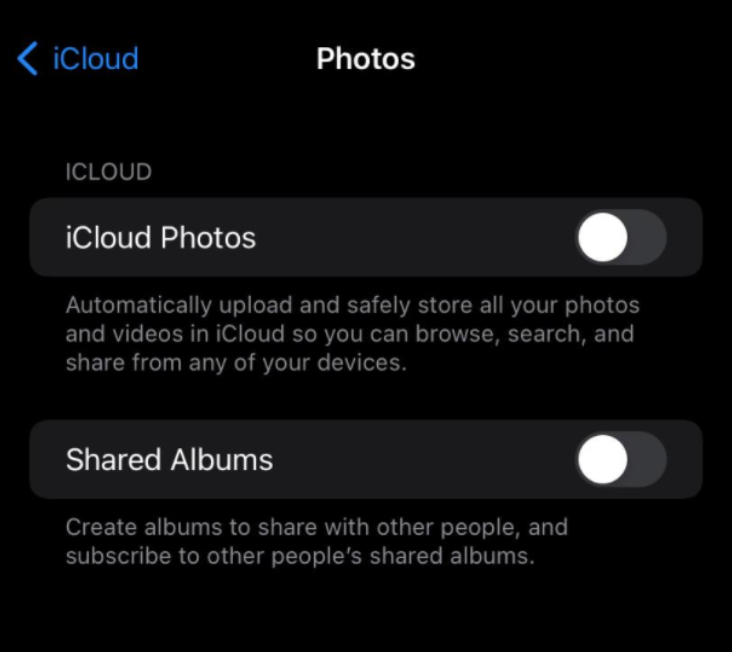
Enabling iCloud Photos
Several users reported that after turning iCloud photos off and on again, the issue was resolved. You can try using this trick as well.
- Open the Settings app on your phone, and go to iCloud.
- Find the ‘iCloud Photos’ button, and toggle the button next to it.
- It is advisable that you wait for a couple of minutes before turning it on again.
Turning FaceTime off and on again
Since there’s a possibility that there’s a glitch on FaceTime, which is causing you to not be able to take Live Photos, you can try turning FaceTime off and on again.
This will help reboot FaceTime, and there’s a high chance that the issue will resolve.
- To turn FaceTime off, go to your phone Settings, and find the FaceTime app.
- Toggle the button next to it to turn FaceTime off.
- Wait a couple of minutes before turning it on again, and check if the issue has been resolved after doing so.
Conclusion
Communication between Apple devices is extremely easy, with iMessage and FaceTime.
Since users had reported issues with the FaceTime live photos not saving, in this article, we covered several solutions.
If you liked this article, check out: How to Inspect Element on iPhone.

