How to Deactivate Facebook on iPhone

Are you considering deactivating your Facebook account after so many years of using Facebook?
We understand you fully - social media can be a bit too much at times.
You just got tired of using it, and you think taking a break from Facebook is a good idea. Many Facebook users do this when they feel overwhelmed, either from using it for a longer period or simply due to some data scandals and privacy issues.
Either way, we are here to assist you in this process, and the way to do it couldn’t be easier.
All you need to do is follow our simple guide, and it will be done before you know it.
Bonus read: How to back up Facebook 2022 - including photos and videos?
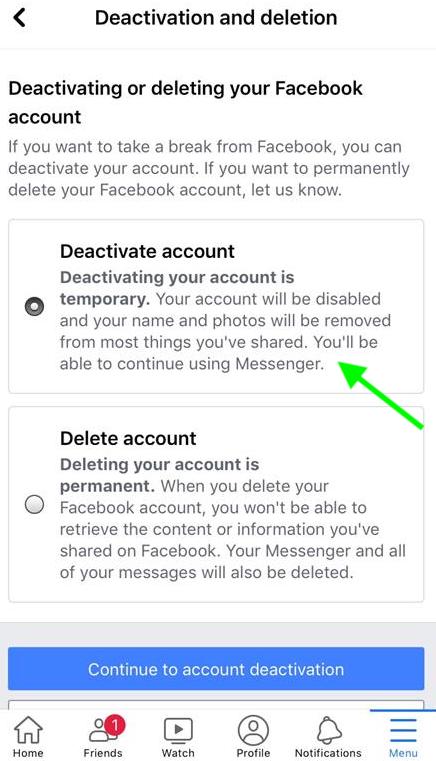
Difference between deactivating and deleting a Facebook account
There is a huge difference between deactivating and deleting a Facebook account, and when a user decides to do one or the other, it is a must to understand how one is different from the other.
Basically, people who just want to take a break from using Facebook and not permanently delete their account there choose to temporarily deactivate their Facebook profiles. This means that after a while if they decide to get back to Facebook, their account can be revived along with the content that they had on it. So, it is a kind of sleep mode of one’s Facebook account.
On the other hand, deleting will permanently delete one's account and erase all content from that account so it won’t appear in any search, just like it never existed. Also, your Facebook friends might still be able to see messages you’ve sent after the account has been deleted.
In addition, some data, such as log records, may remain in Facebook’s database, but they won’t be connected to you, and pages that only you control will be deleted.
Important Note: Remember that there is a 30-day grace period in case you change your mind about undoing this process.
How to deactivate your Facebook account on iPhone
- Launch the Facebook app on your iPhone.
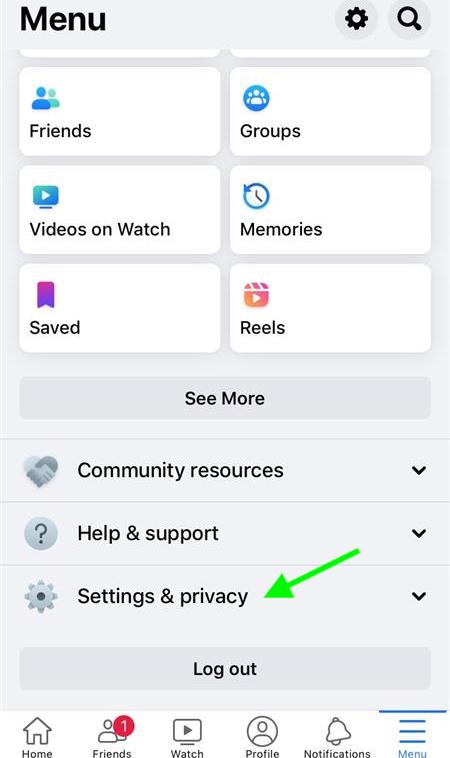
- Tap on the menu icon (three horizontal lines in the bottom right corner).
- Swipe down and tap on Settings & Privacy.
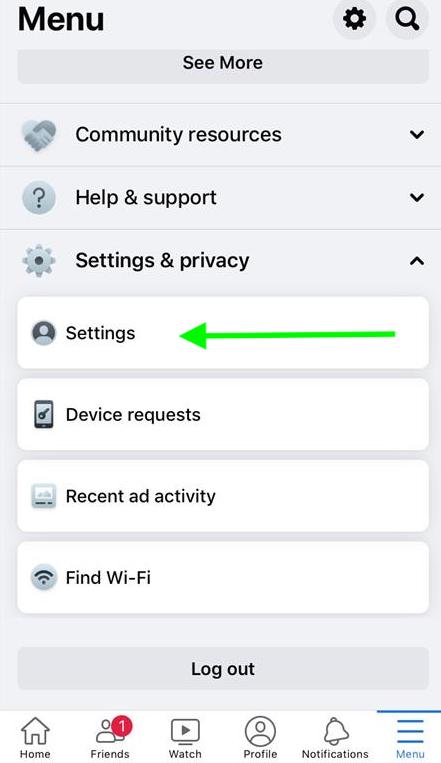
- Tap on Settings.
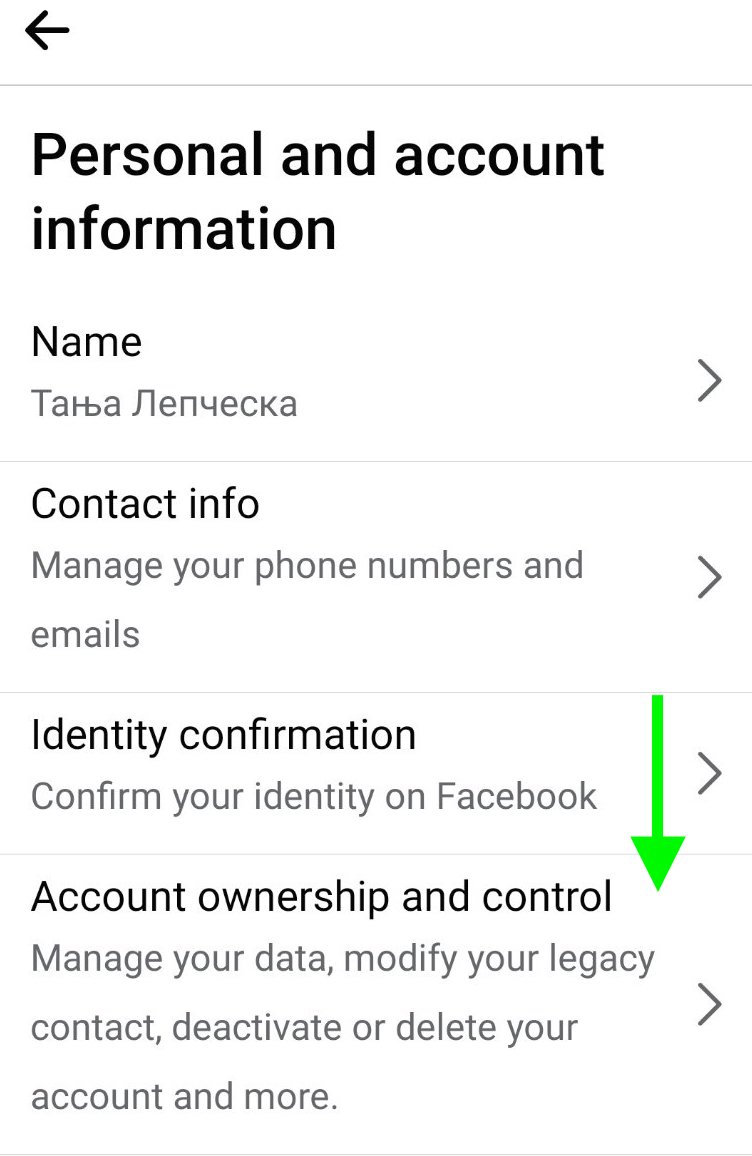
- Swipe down and tap on Account Ownership and Control.
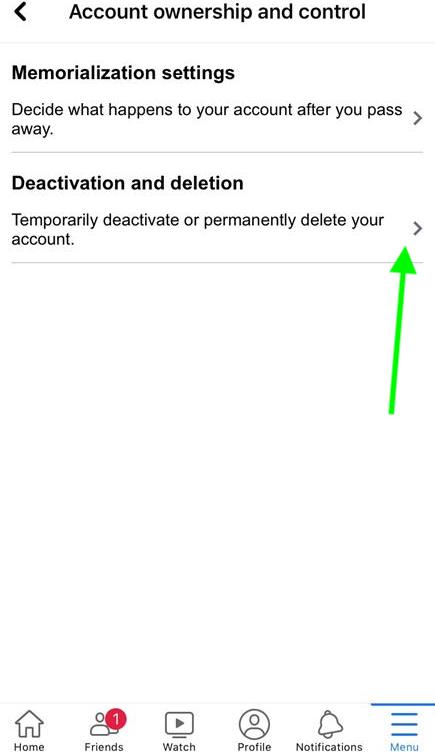
- Tap on Deactivation and Deletion.
- Select the option “Deactivate Account”.
- Tap on Continue to Account Deactivation.
- Enter your password and tap on Continue.
- Scroll down to choose how long you want to deactivate Facebook.
- Tap on Done and then on Continue.
- Last step, tap on Deactivate My Account.
Things that happen after you deactivate your Facebook account
- Your photos, posts, and videos will be hidden but not deleted.
- You will still be able to access Facebook Messenger.
- You will still be able to access accounts through Facebook Login.
How to reactivate your Facebook account
In case you are also interested to learn how to reactivate your Facebook account after some time, we are here to also help you with that.
The way to do it couldn’t be easier:
- Log back into your account.
- Enter your email address or mobile number (those that were previously used for your login).
- Enter your password (if you have forgotten it, you can easily retrieve it by tapping on the “Forgot password” option and following the instructions).
Can I change my Facebook Privacy Settings?
Of course, you can. You can continue using the Facebook platform and have bigger control over your privacy and the data that Facebook keeps about you, for example, your location, face recognition, etc. All you need to do is adjust the privacy and security settings:
- Open the Facebook app on your iPhone.
- Tap on the menu icon.
- Swipe down and tap on Settings & Privacy.
- Tap on Privacy Shortcuts.
Here, you need to read through these privacy and data settings and adjust them the way you want.
Apart from this, you also might be interested in how to delete a kid's Messenger account - we have a blog post on that too.
You can also learn how to turn off captions on Facebook.