How to Save Images on a MacBook
-(2)-profile_picture.jpg)
No matter if you are preparing a presentation for work, creating social media content, working on a school project or just putting together an album of your Facebook photos, you can easily save images on your MacBook.
There are several ways you can save an image on a MacBook. So if you ever found a picture on a website, on social media, or in a document that you wanted to save, keep on reading to learn how to save it on your Mac.
This post will walk you through the different ways how to save images from websites and email on your Mac running on most MacOS versions.
How to save images on MacBook from a website
If you want to save a picture on your MacBook from a website or a social media channel, you can do it using one of the methods below.
#1 Right-click (Context menu)
This is the most used and easiest way to save an image you found online:
- Open the picture you want to save.
- Right-click on the image. Alternatively, you can press and hold ‘Control’ on the keyboard and click the photo to open a drop-down menu.
Quick Tip: If you are using a laptop or trackpad, click or tap with two fingers on the touchpad or trackpad to do a right-click, i.e., secondary click.
- A pop-up menu will appear - the Context menu.
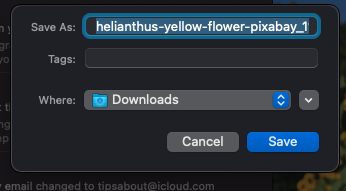
- Select ‘Save image as’ from the menu. Choose a download location and type in the file name you want to use for the saved image.
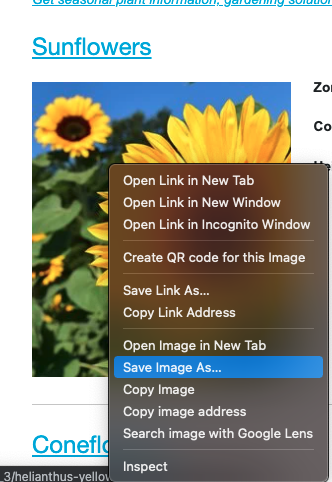
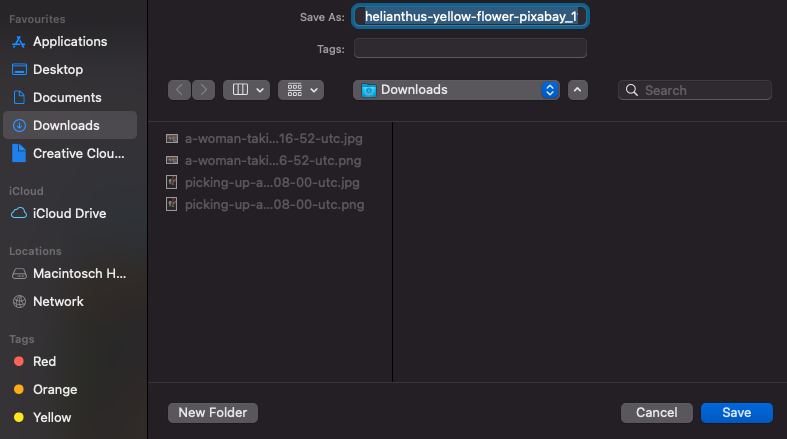
- Click ‘Save’. If you are using Safari, you can also select ‘Save image to “Downloads”’. This will save the image to the ‘Downloads’ folder on your MacBook.
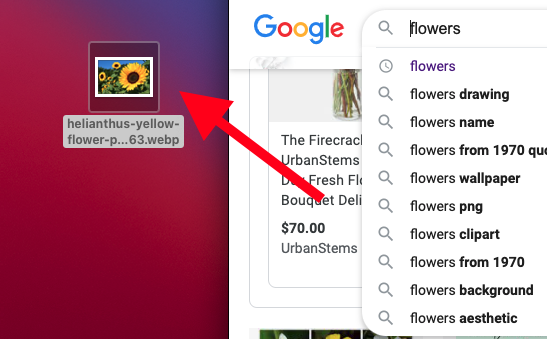
#2 Drag-and-drop
Dragging-to-dropping is another way to save images on your Mac. But this method offers fewer options than right-clicking because you can’t name the image.
- Open the image you want to save.
- Click and hold on the image.
- Now, drag the image off of the borders of the browser window and to the chosen destination: desktop, a folder on the desktop, an open folder, or even right into a Word/Pages or other text editing document.
- When a green circle with a ‘+’ symbol appears over the thumbnail of the picture, release the image. This will place the image file in your desired location.
#3 Screen capture
Making a screen capture on a Mac, also known as a screenshot, or a "print screen" on Windows, allows you to capture and save every image, even those you can’t download, such as images on Instagram and in a PDF document.
To take a screenshot on Mac:
- Press together ‘Command + Shift + 4’ at the same time and then with the mouse or on the touchpad, drag a box around the area of the screen you want to capture.
- Alternatively, press together ‘Command + Shift + 5’. A pop-up window will appear on your screen, giving you a number of options: Capture Entire Screen, Capture Selected Window or Capture Selected Portion.
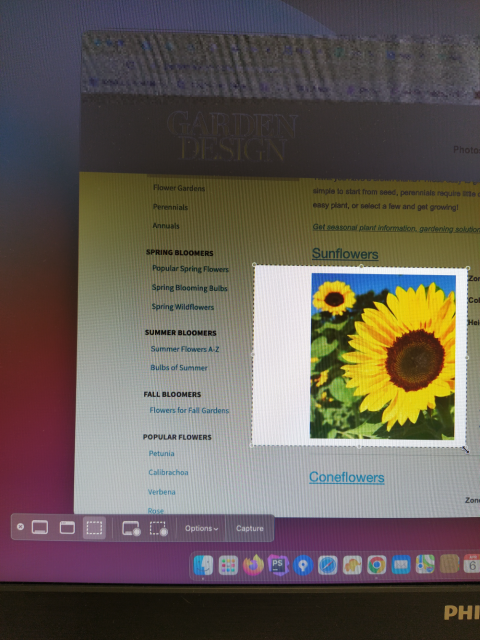
- In both methods, you can name the image file and choose the destination to save it.
- Additionally, you can press ‘Command + Shift + 3’, which will take a screenshot of the entire screen. This method saves the image on your Mac’s desktop.
Bonus: How to delete screenshots on Mac.
How to save images on MacBook from email
You can save images both from Gmail and Apple Mail. We’ll explore both ways below.
Save images on a Mac from Gmail
You can easily save pictures and attachments on Gmail.
- Open your Gmail and go to Inbox to see all your incoming emails.
- If an email has an image attached, you’ll see a red icon with triangles below the subject line and the first words of the email. Open the email and scroll to the bottom to see the images. Alternatively, click on the red icon to open the image in a new screen.
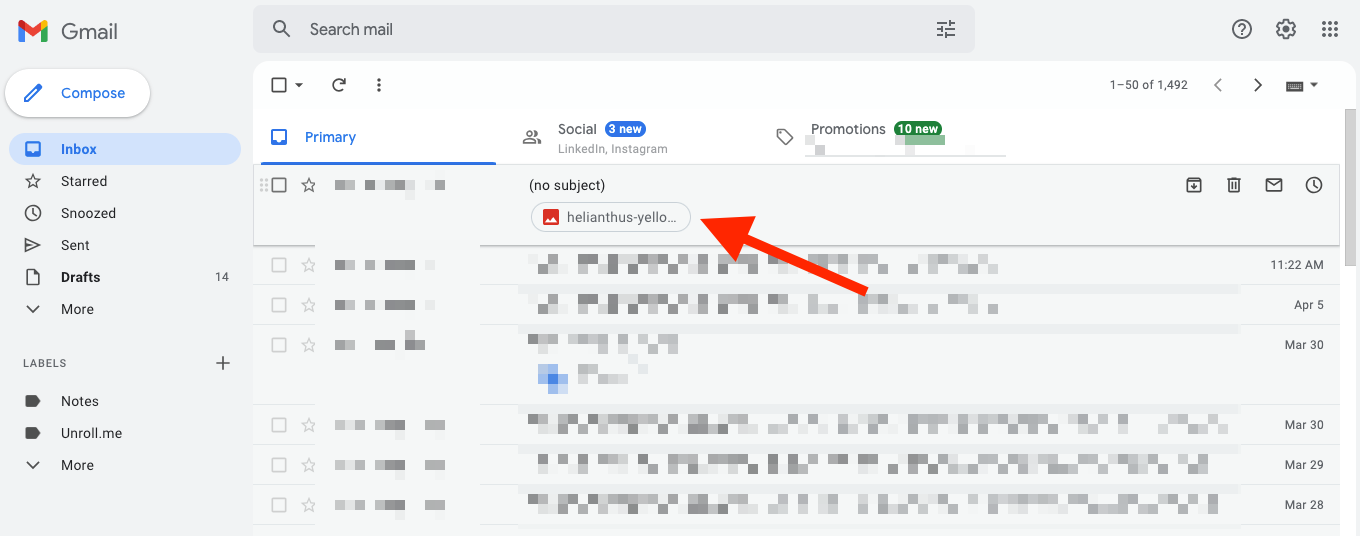
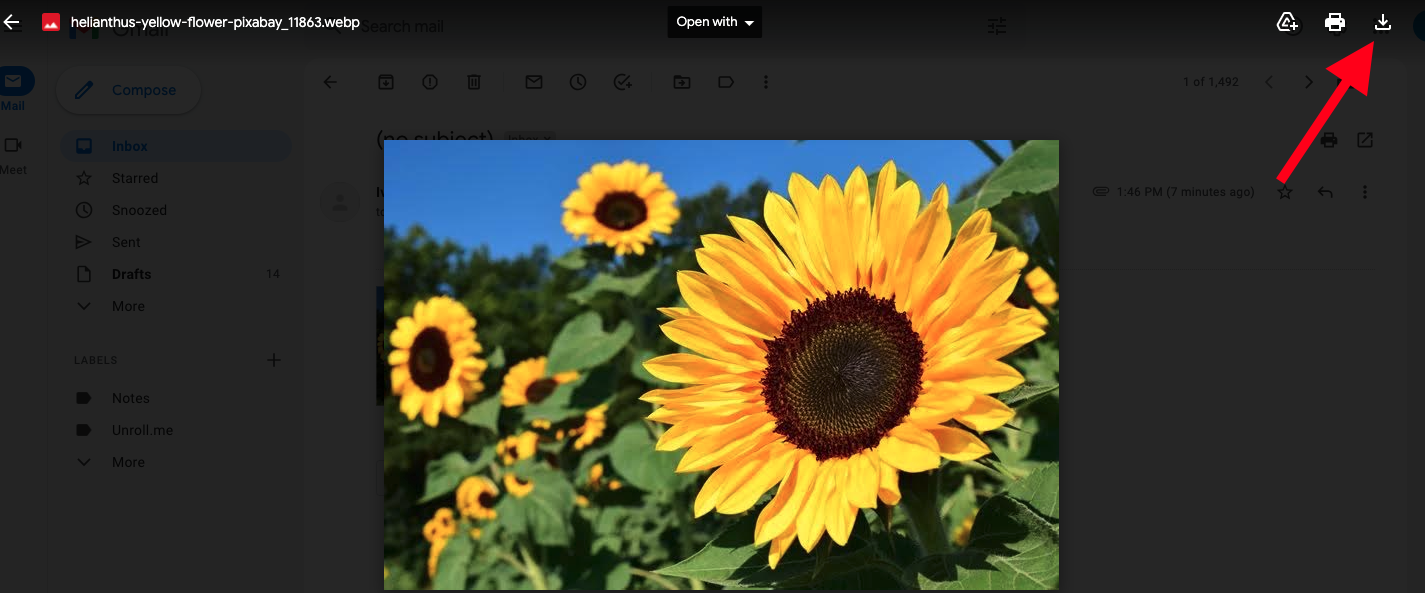
- When the image opens, click on the download icon in the top right corner of the screen to download the photo from Gmail and save it to your Mac.
Save images on a Mac from Apple Mail
In Apple Mail, images can appear in-between the email text or at the bottom, depending on how it was attached.
- Open Apple Mail and select the email containing the images you want to save.
- Hover your mouse on the horizontal line below the header to display the action bar.
- Click on the ‘paperclip’ icon on the action bar to open a drop-down menu.

- Select individual photos to save or 'Save All' for multiple photos. You can also export them to your Photos app.
- Choose a location where to save the pictures.
- Click on ‘Save’ to start the download.
If you use Outlook on Mac, the steps for saving images are similar to Apple Mail. Open an email with photos and click on ‘Download All’ to download several images or click on the arrow next to an attached image, and then select ‘Save As’.
Bonus read: How to Turn Off Core Sync on Mac