How to Activate Mac Scroll Bar Up and Down Arrows
Long-term Mac users were used to the Scroll Bar MacBooks had, until the ‘Lion’ update was introduced by Apple.
With Mac OS X ‘Lion’, the scroll bar was removed from the Mac look, and users were furious since they were left with their touchpad as the only resource to scroll up and down.
However, a common misconception is that the scroll bar was removed completely, and it cannot be found anymore to be activated.
Fortunately, this is false, and the scroll bar can be brought back and activated on any MacBook with a few simple steps that will make your scrolling time easier!
When the removal of the scroll bar was announced, this was probably due to the fact that all other Apple gadgets - iPhones and iPads don’t have a scroll bar, and they broke records with the number of units sold.
Hence, Apple opted to remove them on the MacBooks as well.
Therefore, if you’re a long-term Mac user, and you miss the old scroll bar, but you don’t know how to bring them back, you’re in the right place.
In this guide, we’ll show you how to get them back in a few simple clicks.
How do I activate the Scroll Bar on my MacBook?
As we mentioned, the Scroll Bar is a feature that is currently disabled by default on all MacBooks. However, you can get your up and down arrow keys from your laptops’ System Preferences.
To change the scrolling option, follow these steps:
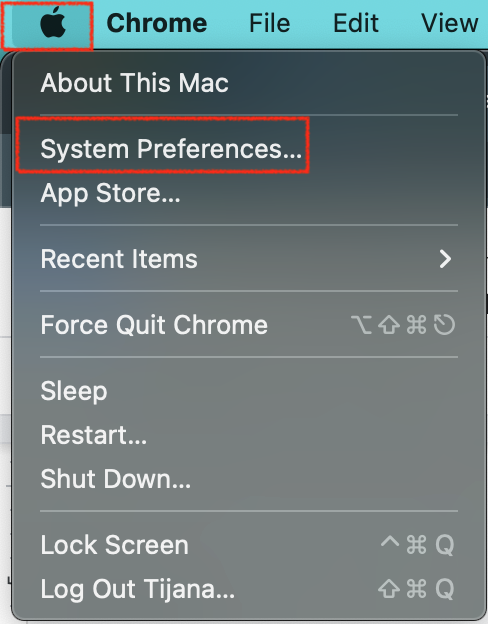
- In the upper-left corner of your screen, click on the Apple logo.
- Next, from the drop-down menu, select ‘System Preferences’.

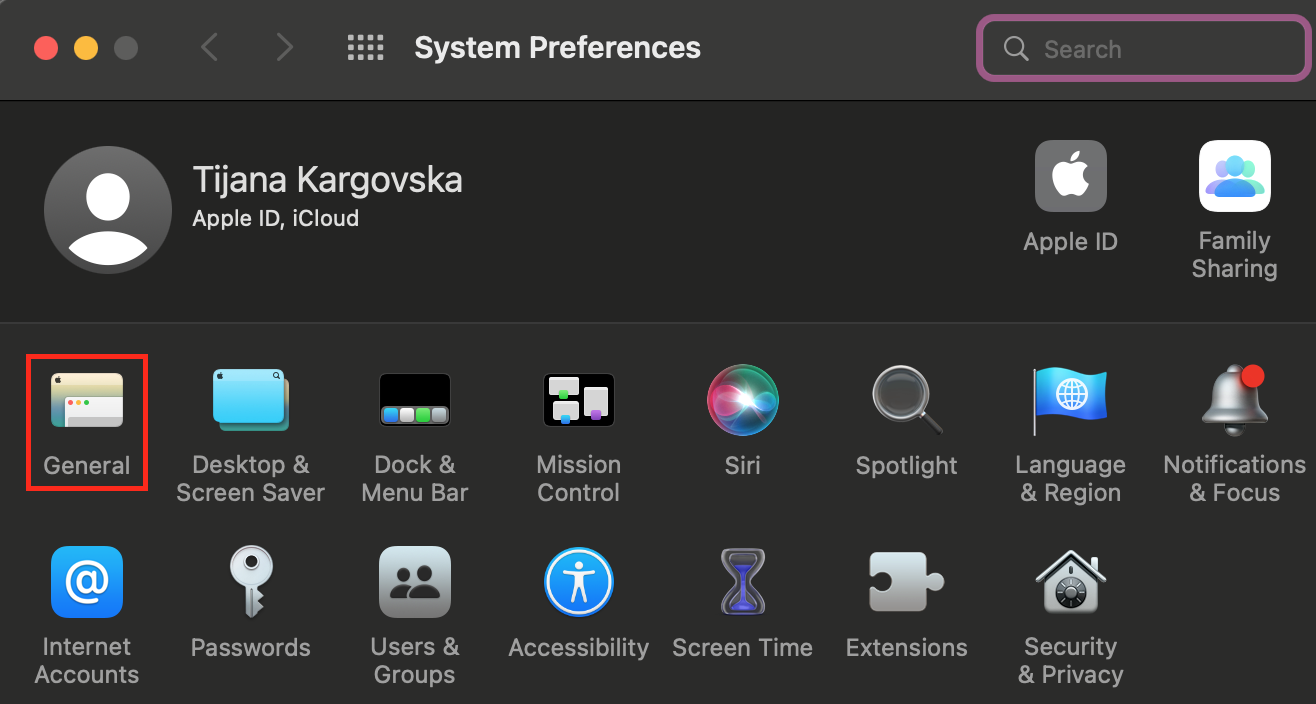
- On the following screen, click on ‘General’.

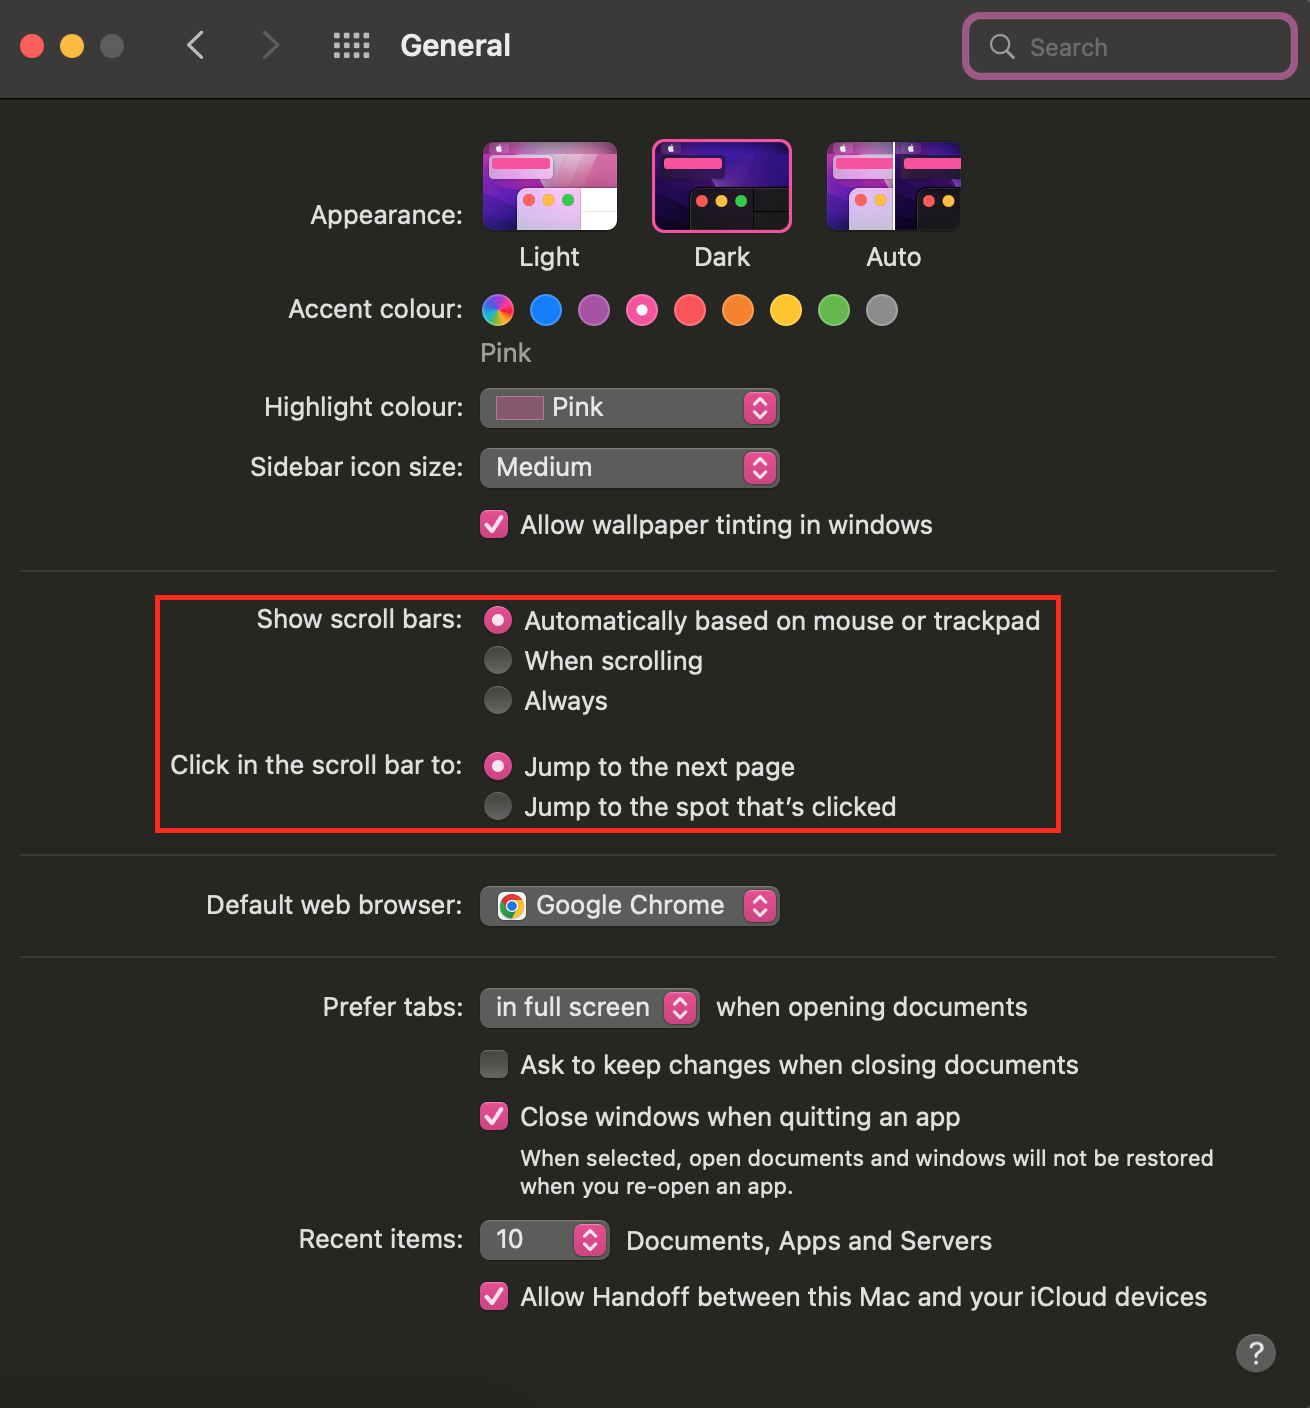
- Under ‘General’ you’ll see a whole section dedicated to scrollbar arrow buttons, where you can make adjustments based on your preferences.

- Apple’s options that can be adjusted in this section are:
- Show scroll bars: ‘Automatically based on mouse (magic mouse as well) or trackpad’, ‘When scrolling’ or ‘Always’.
- Click in the scroll bar to: ‘Jump to the next page’, and ‘Jump to the spot that’s clicked’.
Additional note: If what you’re looking for is the old type of scroll bar, as it were before the ‘Lion’ OS, you should select the ‘Always’ option.
-
How do I get scroll bar arrows on my Mac?
-
Activating this feature only requires a few simple clicks and steps, and you can activate it by clicking on the Apple logo > System Preferences > General > ‘Show Scroll Bar’ > Always.
-
How do I use the scroll arrows to scroll on my MacBook?
-
If the ‘Scroll Lock’ is activated, clicking once on either the ‘Up’ arrow, or the ‘Down’ arrow, will move your page one row down or up.
If the ‘Scroll Lock’ is not activated, the scroll arrows will function similarly to when you’re using the touchpad or a mouse.
-
How do I disable the ‘Scroll Lock’ feature on a MacBook?
-
On a Mac Computer, to disable the ‘Scroll Lock’ feature, press F14 or Shift + F14. Another method to turn it off if this one doesn’t work, is by clicking Command + F14.
On a MacBook, you’ll need to press ‘Fn’, ‘Shift’, and the ‘F12’ buttons at the same time.

