How to Time-Lapse a Video on iPhone 2024

For those who don’t know this by now, a time-lapse video is simply a collection of photos that are taken over a longer period of time and are played backwards at the same speed as a regular video.
This article will help you understand how you can record a time-lapse video on your iPhone, using the time-lapse mode in the camera, which will eventually turn a regular iPhone video into a time-lapse one.
Keep on reading to find out more on how to time-lapse a video on your iPhone.
What does a time-lapse video mean
In the most simple explanation, time-lapse means a photographic technique that is used to speed up the perception of time. Therefore, a time-lapse video would essentially mean a series of photos shown in quick succession. As an example, the result can be a great compression of time so it seems that flowers quickly bloom or when a day turns to night in the blink of an eye.
How to make a time-lapse video on iPhone
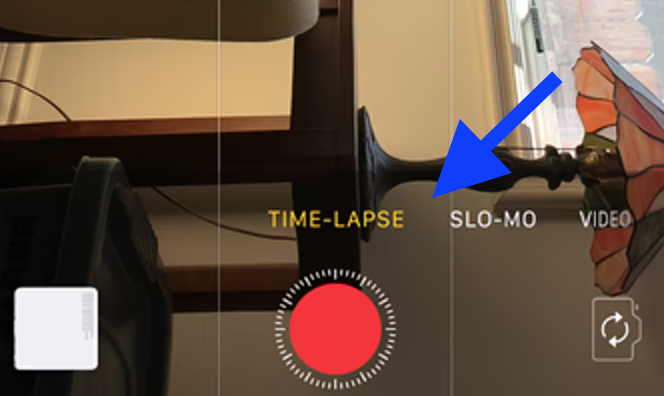
The iPhone's camera has this option known as ‘time-lapse’ for you to switch between video and still photo mode. Actually, when you choose the time-lapse mode, your iPhones’ camera will automatically record a video. So even though your phone’s camera will do all the work, you have to set it up straight? and here is how:
- Open your iPhone’s camera.
- Swipe to the right side to find the ‘TIME-LAPSE’ option. Once you find it, tap on it.
- Then, tap the red record button when you want to start recording.
- Also, tap again on the red record button to stop recording.
- The time-lapse video will be saved in your Photo library under Recents and Time-lapse.
Things to keep in mind when you record a time-lapse video on iPhone:
- Place your iPhone on a tripod or a stand so that your iPhone stays in the same place the entire time you record your video.
- Exposure and focus are important when recording, so lock them throughout the entire recording time. Otherwise, it will change with each new frame.
- Be patient and give it time when recording. Filming for about half an hour can give you a good amount of video to play with later.
Can I change the speed of the time-lapse video on my iPhone, after I record it
Once you select the time-lapse option with its speed, there is no way you can change it. However, some apps can give you some control over the time-lapse features.
Can I trim and crop a time-lapse video on my iPhone
Yes, you can do it and this is available by using your Photos app just like you would crop any other video on your phone. So, to be reassured that this is the process to do it, check out these steps:
- To trim your time-lapse video:
- First, open your recorded time-lapse video in 'Photos' and tap on 'Edit'.
- Then, slide your finger along the timeline that is at the bottom of your screen till you see a yellow box.
- If you want to trim parts from the beginning or the ending of your video, slide the arrows on either side of the timeline.
- Then, tap on 'Done' and choose 'Save Video' or 'Save Video as a New Clip'.
- To crop your time-lapse video:
- Open your time-lapse video in Photos and tap on Edit.
- Then, tap on the crop icon that is at the bottom of your home screen.
- When the white outline appears around your video, drag the edges of the outline to adjust the size and orientation of it.
Check out also how to take scrolling screenshots on iPhone.
Can I time-lapse a video that is already recorded as a regular video on my iPhone
You can do this by using the iMovie app. This will allow your regular video to be in time-lapse mode and to do it, you just need to follow these couple of steps:
- Open the 'iMovie app' on your iPhone.

- Tap on '+ Create Project'.
- Next, tap on Movie and from there, tap on the video to select it and make it time-lapse.
- Then, tap on 'Create Movie'.
- Next, tap on the video in the timeline and on the clock that is in the bottom left corner.
- Tap and drag the speed slider and tap on 'Done'.
- Lastly, tap on the 'Share' icon and then on 'Save' and wait till your time-lapse video is exported.
Important info: If you don’t see your exported video in your Photo library, maybe you don’t have enough space to store it. Therefore, clear up your memory space on your iPhone.
If you like taking screenshots with your iPhone, but accidentally deleted some that you didn't mean to, check out how to recover deleted screenshots.